Category: Storage

  • ZFS: zpool replace returns error: cannot replace, devices have different sector alignment

    Trying to replace a failed SSD in a zpool we encountered the following error:


    cannot replace 4233944908106055 with ata-INTEL_SSDSC2BW240A4_CVD02KY2403GN: devices have different sector alignment


    The pool was aligned to 4k sectors – e.g. ashift=12 – whereas the new SSD was aligned to 512b sectors. There’s a quick and easy fix to this – no need to use partitioning tools:


    (more…)

  • ZFS: Adding a new mirror to an existing ZFS pool


    Mirrored vdevs are great for performance and it is quite straight-forward to add a mirrored vdev to an existing pool (presumably one with one or more similar vdevs already):


    zpool add [poolname] mirror [device01] [device02] [device03]


    If it’s a two-way mirror you will only have two devices in the above. An example for ZFS on Ubuntu with a pool named seleucus and two SSDs could look like:


    zpool add seleucus mirror ata-SAMSUNG_SSD_830_Series_S0XYNEAC705640 ata-M4-CT128M4SSD2_000000001221090B7BF9


    As always, it’s good practice to use the device name found in /dev/disk/by-id/ rather than the sda, sdb, sdc etc. names as the latter can change – the former do not.

  • Ubuntu: How to use multiple cores with tar gzip compression


    One thing you may have noticed when using the z switch with tar is that the compression can take some time! If you look at your CPU usage, though, you’ll notice that only one core is being utilised to compress the files. In a modern system 4 or 8 cores are common, meaning that there is plenty of potential to speed up the process if you could utilise more cores. As the gzip package only supports one core, we need to look elsewhere.


    Fortunately, there is a gzip package which uses multiple cores available – it’s called pigz. To install it type:


    sudo apt-get install pigz


    Once that is installed we can tell the tar command to use it like so:


    tar -c --use-compress-program=pigz  -f [tar file] [directory or files]


    e.g.:


    tar -c --use-compress-program=pigz -f backupOfMovies.tar /opt/movies


    Note the double hyphen before use. Check your CPU usage while the command is running – you should be able to see all available cores being utilised!

  • Ubuntu: How to add or append a file to an existing tape backup


    Sometimes you may with to add files to an existing backup; if you issue a command like:


    tar -cvf /dev/st0 backupfiles


    …and the tape is not already set to the end of the previous archive you will over-write any data from the position on the tape. Use the “eom” command to move the tape to the end of the alread-recorded files like so:


    mt -f /dev/[path-to-tape] eom


    e.g.:


    mt -f /dev/st0 eom


    Now you can use tar to add a file to the tape without over-writing the existing data.

  • Ubuntu: Using compression on your tape backups


    If you have compressible data you may save space on you tapes by using compression; this comes at a cost of CPU cycles to do the compressing, which can often be a worthwhile tradeoff for a long-term backup. To do this is quite simple – add in the -z switch to your tar command.


    tar -cvzf /dev/[tape-device] [folder or files to back up]


    e.g.:


    tar -cvzf /dev/st0 /opt/movies


    For some file types – e.g. movies, mp3s, compressed picture files and the like you probably won’t see a great deal of space saved – though if it enough to save you from using two tapes instead of one, it may be worth it even so. Text and other file types may compress more easily and you may see more of a savings – it will vary greatly depending on your dataset. Try it and see!


    Sometimes you may see people using the -j switch instead – this uses the bzip2 algorithm rather than the gzip algorithm (the -z switch). You will probably find that gzip is slightly better supported and bzip2 sometimes provides slightly better compression but takes longer. If you are chasing better compression it may be worth replacing the z switch with j to see if it helps.

  • Ubuntu: Using tar to span a backup across multiple tapes


    Following on from the article on writing files to a tape backup, what happens if you want to back up more than what fits on a single tape? Here we want to use the –multi-volume switch, or -M. Use it so:


    tar -cvMf /dev/[path-to-tape] [backup folder or files]


    As a working example:


    tar -cvMf /dev/st0 /opt/movies


    Once the first tape is full, tar will prompt you to insert another:


    Prepare volume #2 for `/dev/st0′ and hit return:


    Make sure you replace the tape with another before hitting return or else it will over-write the just-finished tape!


    With the exception of a file which sits across multiple tapes (think of a file which starts at the end of one tapes and finishes at the start of the next) you don’t need a first tape to restore the files on the second. You also cannot use compression for multi-volume archives.

  • How to test and check a HP StoreWorks Ultrium tape drive


    With used tape drives falling in price they are now finding their ways into the hands of more home storage enthusiasts; one should be wary about purchasing a tape drive in unknown condition, though, as there’s a good chance that it may be faulty or require servicing. One way to check the status of the tape drive for HP units is their Library and Tape Tools software – currently available from here:


    http://h18006.www1.hp.com/products/storageworks/ltt/


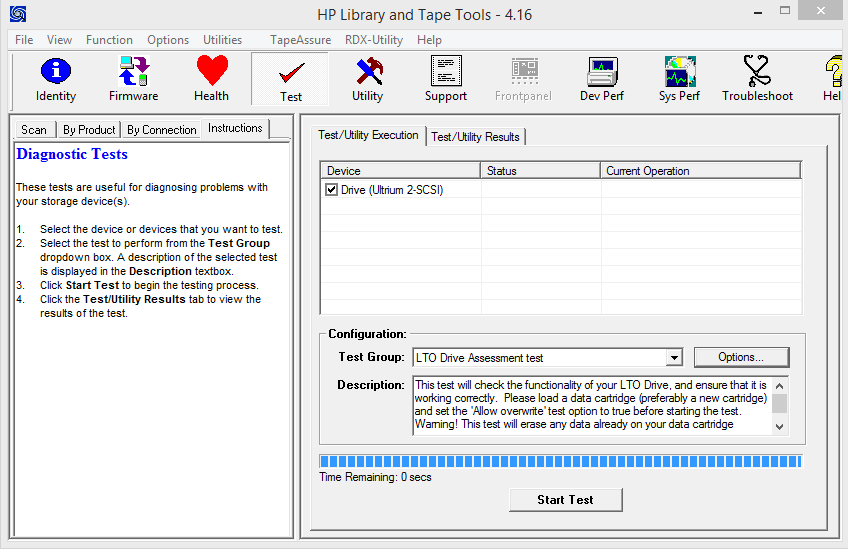
    To run a test, open L&TT and click on the Test tab:


    hp-library-and-tape-tools-test-01

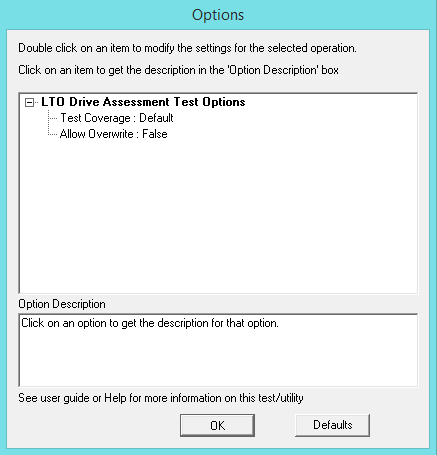
    Insert a tape into the drive that is blank (or has data you don’t mind being over-written), click on Options:


    hp-library-and-tape-tools-test-02


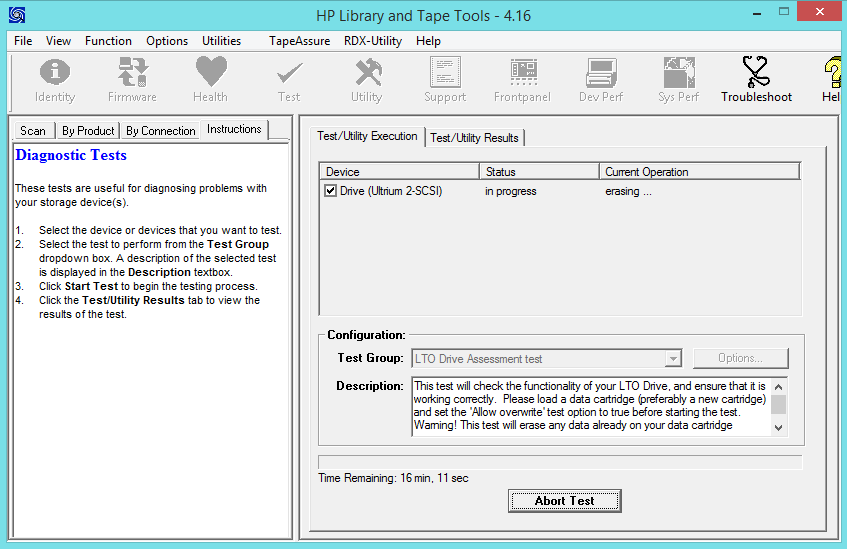
    Click (or double click) on Allow Overwrite and change it to True, then click OK. You will be returned to the previous screen. Click “Start Test”.


    hp-library-and-tape-tools-test-03

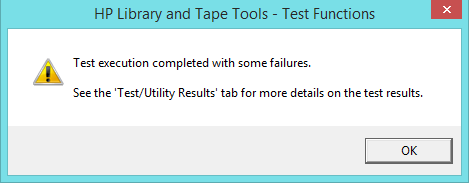
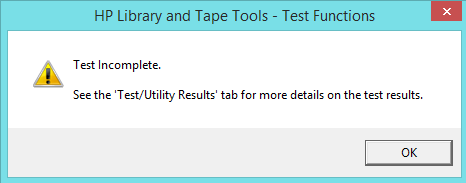
    What you don’t really want to see is a pop-up a couple of minutes later like this:


    hp-library-and-tape-tools-test-04

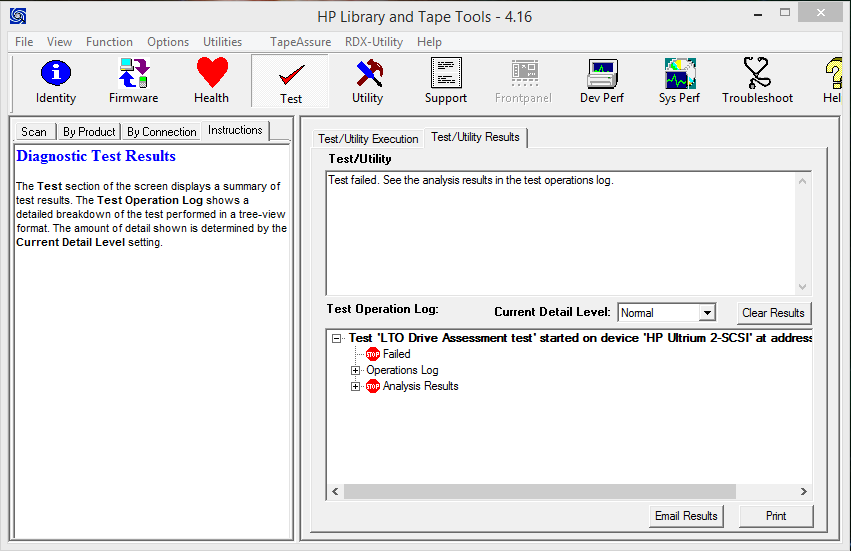
    Time to look at the Test/Utility Results tab:


    hp-library-and-tape-tools-test-05

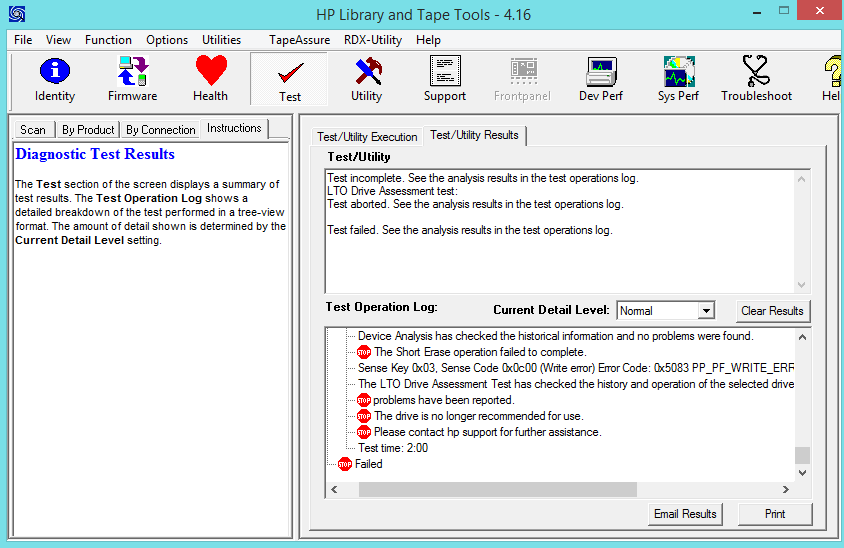
    From here we can expand the Analysis Results to see what has happened:


    hp-library-and-tape-tools-test-08


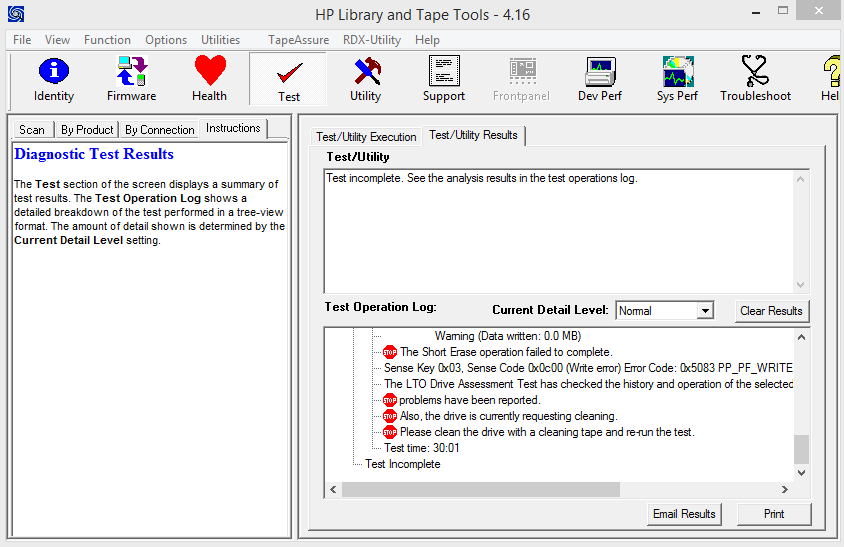
    Another possible result is an incomplete test:


    hp-library-and-tape-tools-test-06

    This can sometimes happen because the drive needs cleaning – if you open the Analysis Results you will see a request for cleaning if this is the case:


    hp-library-and-tape-tools-test-07

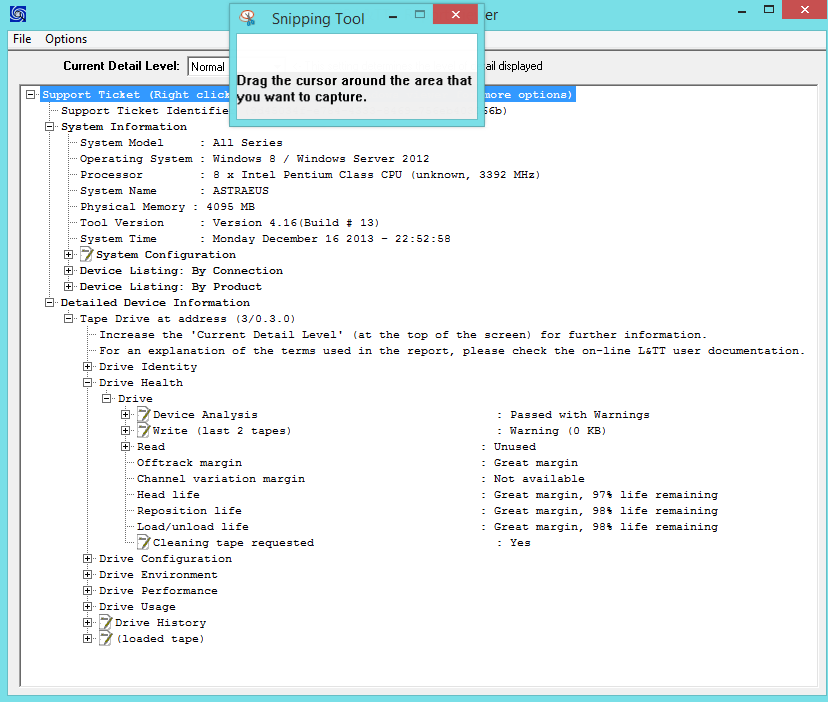
    Hopefully, though, you get a passed test with no issues such as these! To get a detailed report of the drive status we can use the Report Viewer – click on the Support tab at the top, then Refresh Device Data, then View Support Ticket. You should see a report with expandable headings which provides a great deal of information, e.g.:


    hp-library-and-tape-tools-test-09

    There is a wealth of information here, covering both the drive and the tape inside. Worth checking over for any anomalies if you have just received a new drive!

  • Western Digital Se 2TB (WD2000F9YZ) Hard Drive Review


    wd-2tb-se-hdd-2


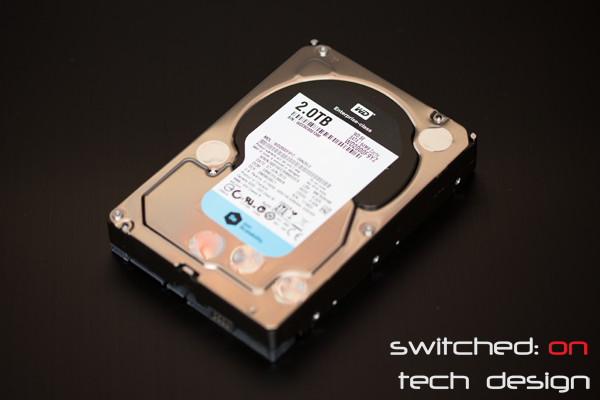
    Today we are looking at a new line of drives from Western Digital – the Se range. Click through to read our review of the baby of the new line – a 2TB drive…


    (more…)

  • How to install an Asus PIKE 2008 card


    As a non-standard PCI-Express card, the Asus PIKE card involves a slightly different installation procedure.


    asus-pike-card-01


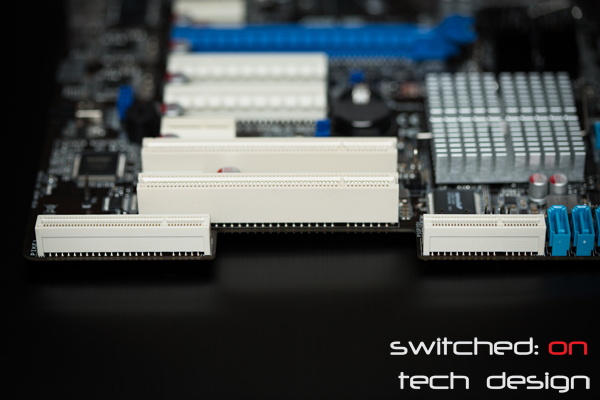
    The PIKE slot sits on either side of a gap in the motherboard:


    asus-pike-slot


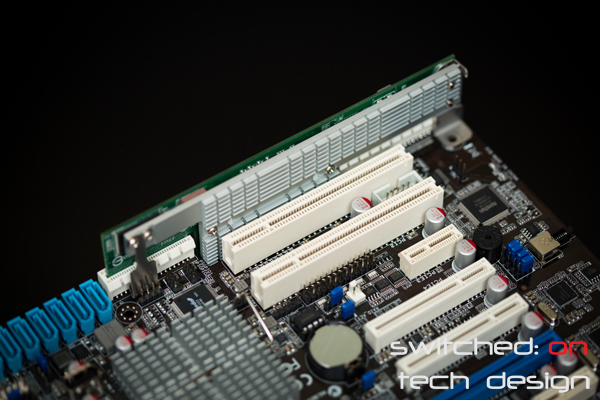
    You’re definitely not going to mistake it for a regular PCI-Express slot. The card only goes in one way, with the heatsink facing the PCI slots; it can be a little hard to get in sometimes as it needs to be inserted from almost directly above.


    asus-p9d-e4l-pike-card-in


    Motherboard-side view:


    asus-pike-installation-03


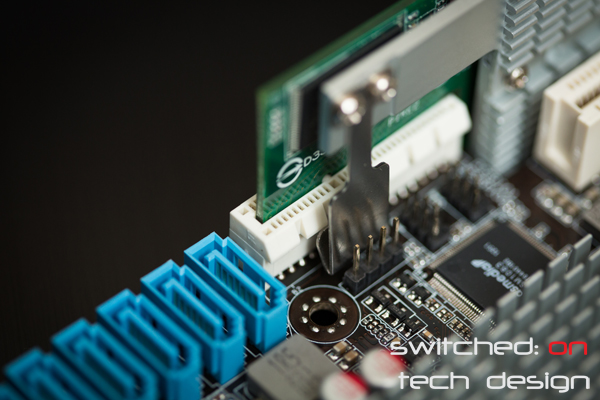
    The card is secured on either end; on the side closest to the SAS/SATA ports, it hooks under a latch on the slot:


    asus-pike-installation-01


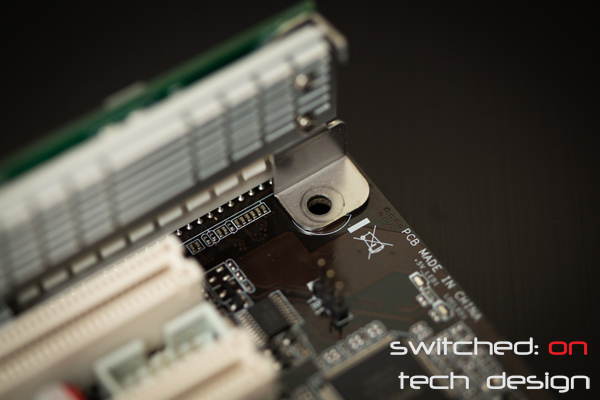
    Here you can see the metal part of the PIKE card latching underneath the slot’s edge. You can also see how close other board components often are to this end! The other end sits over one of the motherboard mounting holes:


    asus-pike-installation-02


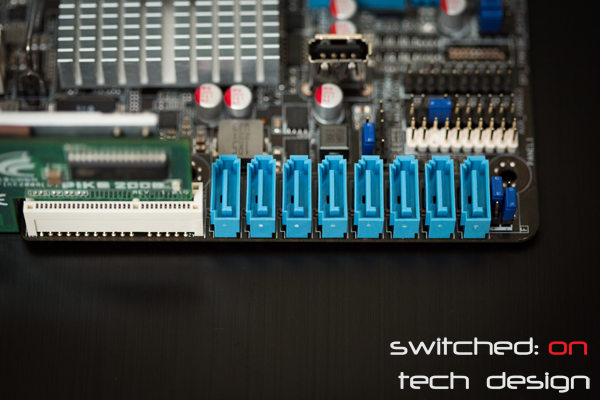
    Don’t install the card without taking this screw out first, otherwise you’ll be taking it out and starting over. Now the card will activate the SAS/SATA ports next to it:


    asus-p9d-e4l-sas-pike-ports


    Easy done! Taking the card back out can be a little challenging with the metal clip on the side where the ports are, particularly if you have PCI cards still installed while you try to remove it (e.g. when the motherboard is still in the chassis). On the topic of removing the card while the motherboard is still in the chassis – as the card is quite short and the insertion pressure is reasonable so it’s quite difficult to remove in the chassis if there’s not a lot of space on both sides. A better idea is usually to take the motherboard out in these cases to minimise the risk of damage to the card or other board components.


    You can buy the Asus PIKE 2008 card from Amazon.com:


  • Asus PIKE 2008 card review


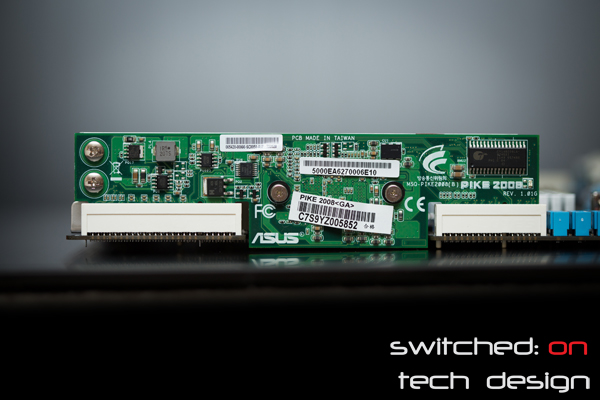
    Many storage enthusiasts are familiar with the IBM M1015 card, an IBM rebadge of the LSI 9220-8i host bus adapter (HBA), based on LSI’s SAS2008 chipset. Less are familiar with Asus’ PIKE card – essentially the same thing in Asus’ own form factor, fitting only their proprietary PIKE slots.
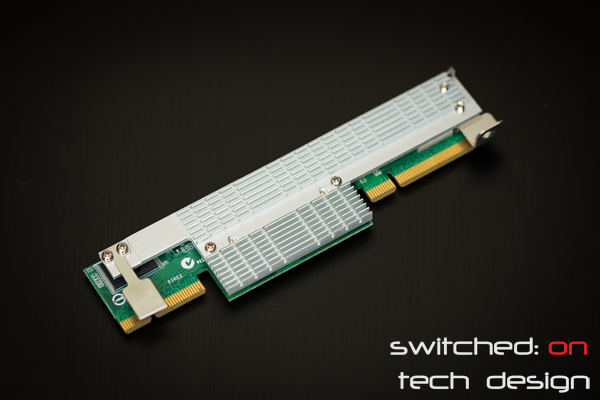
     

    asus-pike-card-01


    This card activates the onboard eight 6gb/s SAS/SATA ports featured on server boards with PIKE slots. The straight 2008 model acts just like an M1015 in IT mode; the IMR model gives you RAID capabilities, namely RAID1/RAID10/RAID0/RAID1E.


    The card itself is quite small, fitting into 1U chassis’ – at a mere 1.57″ high and 6.44″ long, it’s quite a bit lower than your usual PCI-E cards. Operating system support for the SAS2008 chipset is excellente – it has worked out of the box with every modern OS and hypervisor we have tried recently (e.g. Windows 7, Ubuntu 10.04-12.04-13.04, OpenIndiana, ESXi 4+ etc.).
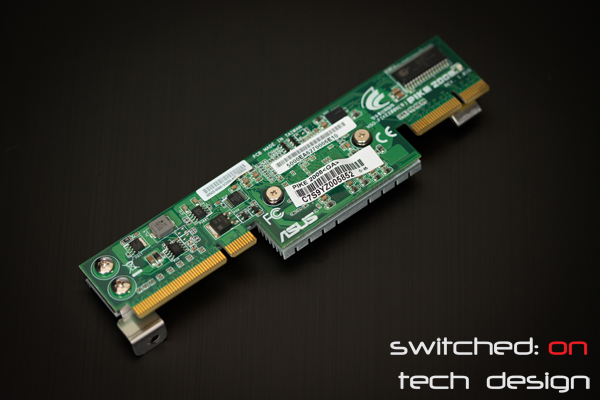
     

    asus-pike-card-03


    The card itself is readily available, at least in the US and AU – at around $130/140 new it’s actually extremely reasonably priced vs. picking up a used M1015 on eBay. With a PIKE card you’ll get a warranty, make use of an otherwise-unusable slot and keep one of your PCI-E slots free for other uses, so there are quite a few reasons to consider one.
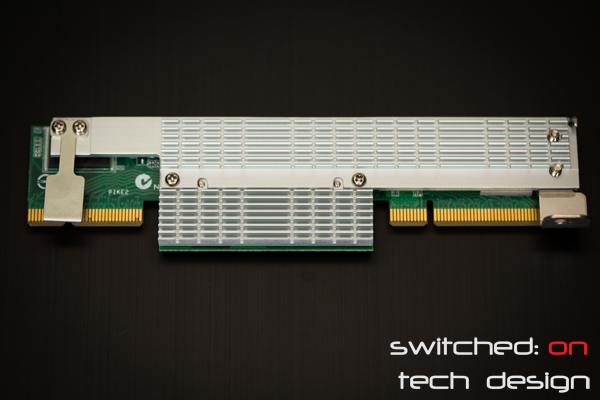
     

    asus-pike-card-02


    One caveat exists, primarily affecting those attaching a number of SSDs to the controller. Not all Asus motherboards have the same electrical connectors to the PIKE slot – some are PCI-E 2.0 x4, some PCI-E 2.0 x8, some PCI-E 3.0 x8 – there may be other combinations but these are the ones we have tested so far. A x4 connector may bottleneck a number of SSDs in use simultaneously; it’s extremely unlikely that you’ll hit that limit with spinning disks. It’s worth being aware of what electrical connection is present to you PIKE slot if you ever intend on hooking up a lot of fast drives as you may end up unintentionally bottlenecking their performance.


    In terms of performance, it acts exactly the same as plugging in an IT-mode M1015; eight extra ports are activated without fuss and drives hooked up to those ports should appear immediately in your OS. lspci should show something along the lines of:


    03:00.0 Serial Attached SCSI controller: LSI Logic / Symbios Logic SAS2008 PCI-Express Fusion-MPT SAS-2 [Falcon] (rev 03)


    Super straight-forward – couldn’t be easier. The card supports hot-swapping, too.


    The PIKE card is well worth a look in as an alternative to a secondhand M1015/LSI card for those enthusiasts with an Asus board with a PIKE slot.


    Also see: How to install a PIKE 2008 card

    You can buy the Asus PIKE 2008 card from Amazon.com: