Category: Tape

  • Ubuntu: How to use multiple cores with tar gzip compression


    One thing you may have noticed when using the z switch with tar is that the compression can take some time! If you look at your CPU usage, though, you’ll notice that only one core is being utilised to compress the files. In a modern system 4 or 8 cores are common, meaning that there is plenty of potential to speed up the process if you could utilise more cores. As the gzip package only supports one core, we need to look elsewhere.


    Fortunately, there is a gzip package which uses multiple cores available – it’s called pigz. To install it type:


    sudo apt-get install pigz


    Once that is installed we can tell the tar command to use it like so:


    tar -c --use-compress-program=pigz  -f [tar file] [directory or files]


    e.g.:


    tar -c --use-compress-program=pigz -f backupOfMovies.tar /opt/movies


    Note the double hyphen before use. Check your CPU usage while the command is running – you should be able to see all available cores being utilised!
  • Ubuntu: How to add or append a file to an existing tape backup


    Sometimes you may with to add files to an existing backup; if you issue a command like:


    tar -cvf /dev/st0 backupfiles


    …and the tape is not already set to the end of the previous archive you will over-write any data from the position on the tape. Use the “eom” command to move the tape to the end of the alread-recorded files like so:


    mt -f /dev/[path-to-tape] eom


    e.g.:


    mt -f /dev/st0 eom


    Now you can use tar to add a file to the tape without over-writing the existing data.

  • Ubuntu: Using compression on your tape backups


    If you have compressible data you may save space on you tapes by using compression; this comes at a cost of CPU cycles to do the compressing, which can often be a worthwhile tradeoff for a long-term backup. To do this is quite simple – add in the -z switch to your tar command.


    tar -cvzf /dev/[tape-device] [folder or files to back up]


    e.g.:


    tar -cvzf /dev/st0 /opt/movies


    For some file types – e.g. movies, mp3s, compressed picture files and the like you probably won’t see a great deal of space saved – though if it enough to save you from using two tapes instead of one, it may be worth it even so. Text and other file types may compress more easily and you may see more of a savings – it will vary greatly depending on your dataset. Try it and see!


    Sometimes you may see people using the -j switch instead – this uses the bzip2 algorithm rather than the gzip algorithm (the -z switch). You will probably find that gzip is slightly better supported and bzip2 sometimes provides slightly better compression but takes longer. If you are chasing better compression it may be worth replacing the z switch with j to see if it helps.

  • Ubuntu: Using tar to span a backup across multiple tapes


    Following on from the article on writing files to a tape backup, what happens if you want to back up more than what fits on a single tape? Here we want to use the –multi-volume switch, or -M. Use it so:


    tar -cvMf /dev/[path-to-tape] [backup folder or files]


    As a working example:


    tar -cvMf /dev/st0 /opt/movies


    Once the first tape is full, tar will prompt you to insert another:


    Prepare volume #2 for `/dev/st0′ and hit return:


    Make sure you replace the tape with another before hitting return or else it will over-write the just-finished tape!


    With the exception of a file which sits across multiple tapes (think of a file which starts at the end of one tapes and finishes at the start of the next) you don’t need a first tape to restore the files on the second. You also cannot use compression for multi-volume archives.

  • https://www.sotechdesign.com.au/free-dating-in-usa-and-canada/


    With used tape drives falling in price they are now finding their ways into the hands of more home storage enthusiasts; one should be wary about purchasing a tape drive in unknown condition, though, as there’s a good chance that it may be faulty or require servicing. One way to check the status of the tape drive for HP units is their Library and Tape Tools software – currently available from here:


    http://h18006.www1.hp.com/products/storageworks/ltt/


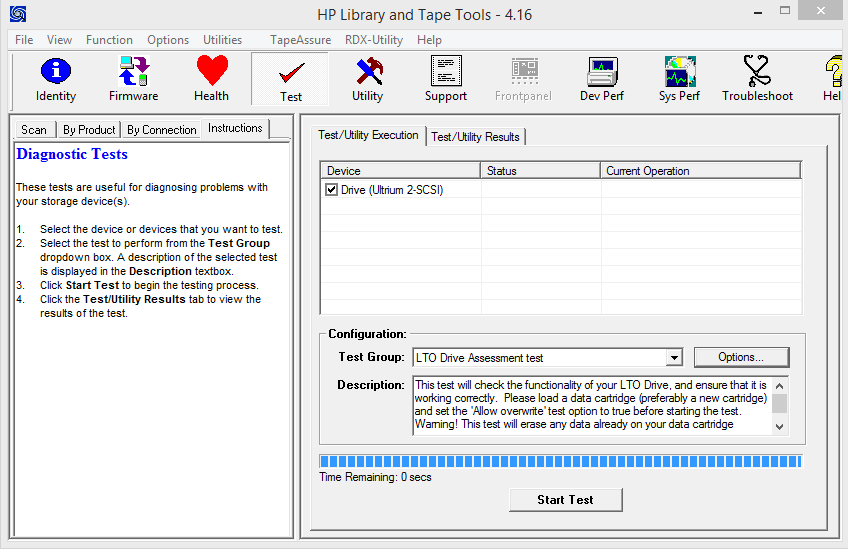
    To run a test, open L&TT and click on the Test tab:


    https://www.sotechdesign.com.au/canada-dating-site/

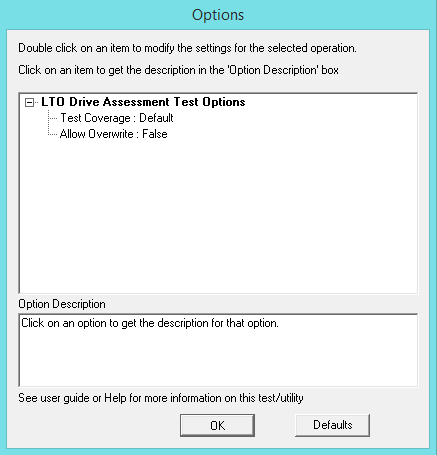
    Insert a tape into the drive that is blank (or has data you don’t mind being over-written), click on Options:


    hp-library-and-tape-tools-test-02


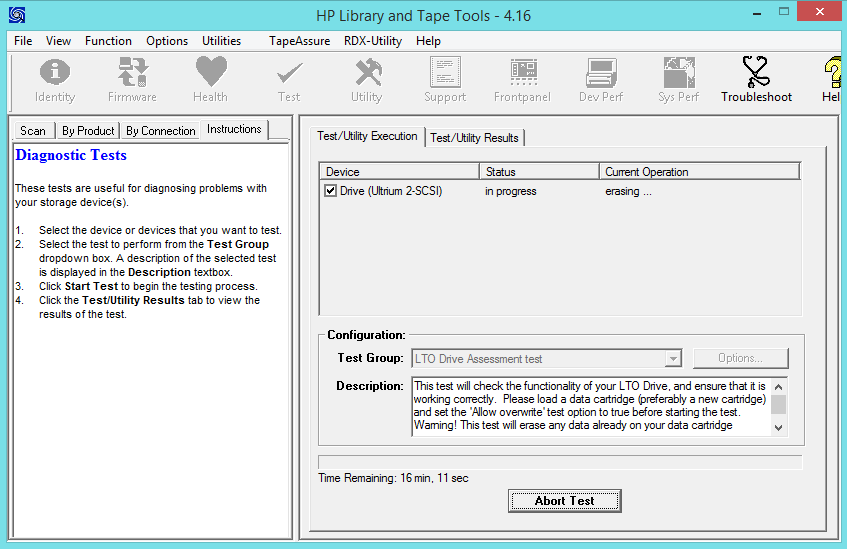
    Click (or double click) on Allow Overwrite and change it to True, then click OK. You will be returned to the previous screen. Click “Start Test”.


    hp-library-and-tape-tools-test-03

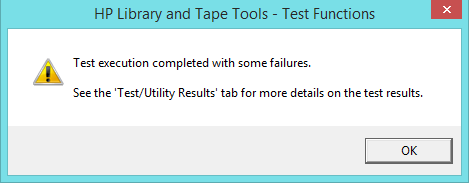
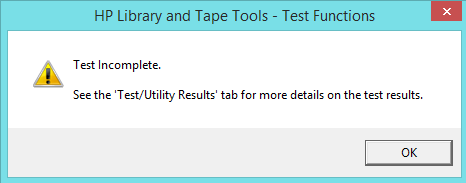
    What you don’t really want to see is a pop-up a couple of minutes later like this:


    hp-library-and-tape-tools-test-04

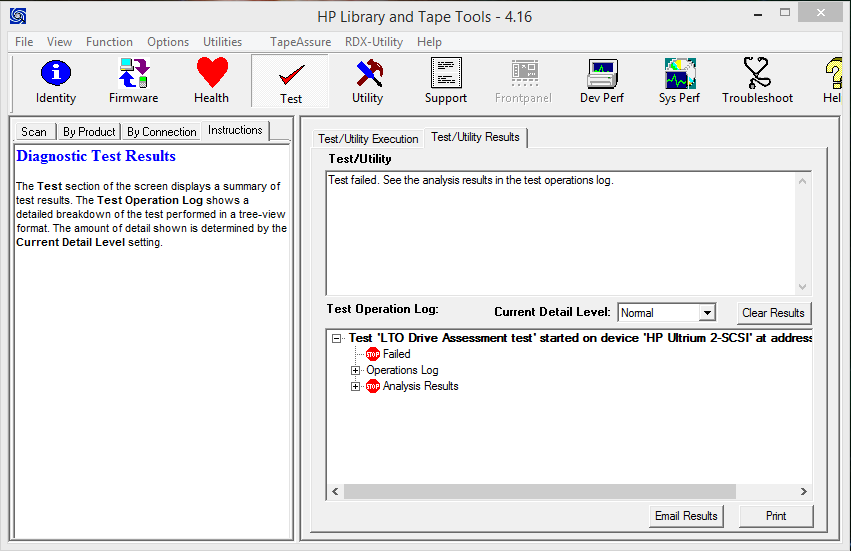
    Time to look at the Test/Utility Results tab:


    hp-library-and-tape-tools-test-05

    From here we can expand the Analysis Results to see what has happened:


    hp-library-and-tape-tools-test-08


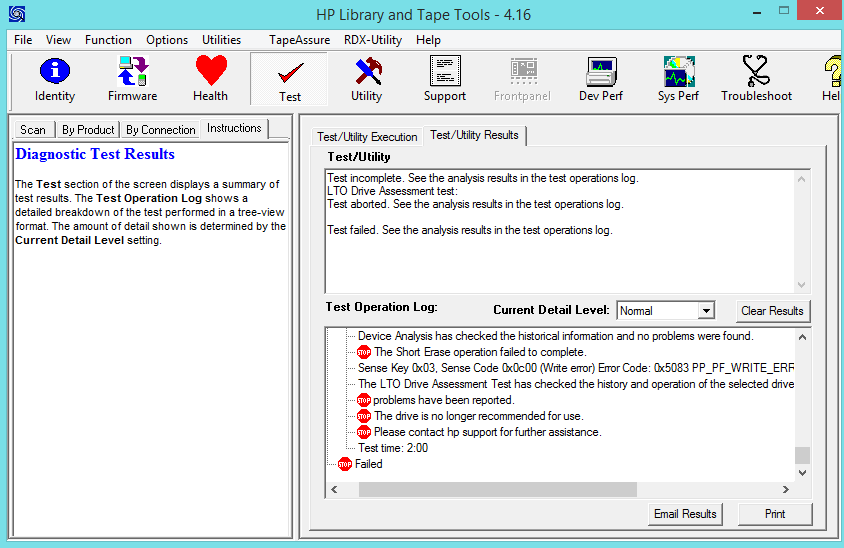
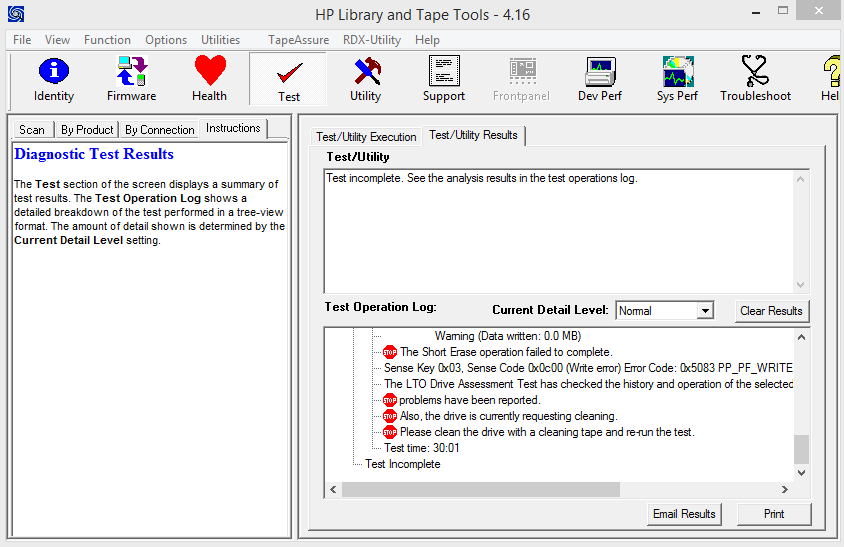
    Another possible result is an incomplete test:


    hp-library-and-tape-tools-test-06

    This can sometimes happen because the drive needs cleaning – if you open the Analysis Results you will see a request for cleaning if this is the case:


    hp-library-and-tape-tools-test-07

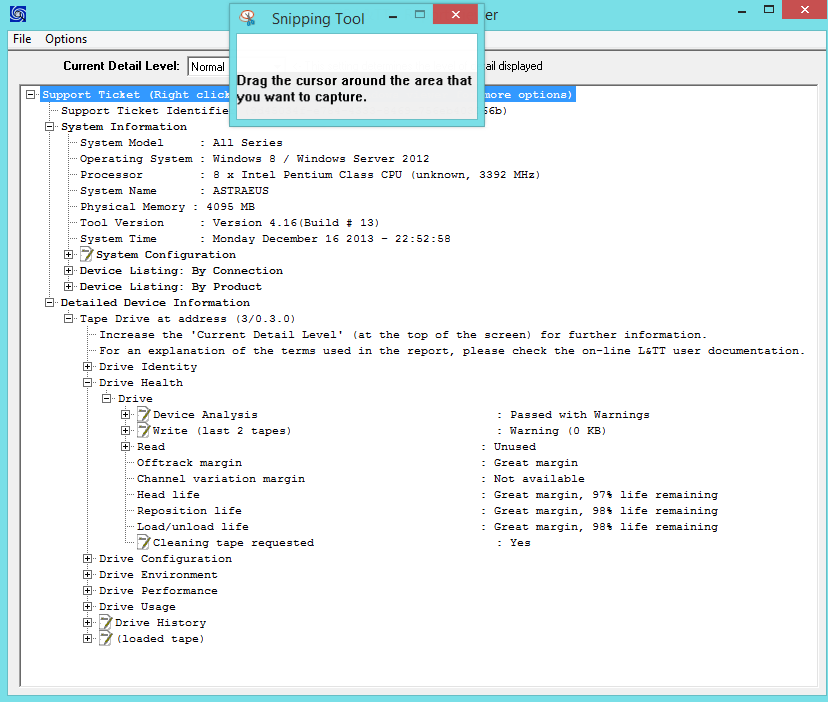
    Hopefully, though, you get a passed test with no issues such as these! To get a detailed report of the drive status we can use the Report Viewer – click on the Support tab at the top, then Refresh Device Data, then View Support Ticket. You should see a report with expandable headings which provides a great deal of information, e.g.:


    hp-library-and-tape-tools-test-09

    There is a wealth of information here, covering both the drive and the tape inside. Worth checking over for any anomalies if you have just received a new drive!

  • Ubuntu: How to restore your files from a tape


    This is just like extracting a regular tar archive:


    tar -xvf /dev/[path to tape] [directory or file to restore]


    e.g.:


    tar -xvf /dev/st0 backups


    This will restore the “backups” file/folder to the current working directory. To check your current directory, you can use:


    pwd


    to make sure that you are restoring your files to the correct location!

  • Ubuntu: How to check the contents of a tape


    To check the contents of a tape, insert the tape and run the following:


    tar -tf /dev/[path to tape device]


    e.g.:


    tar -tf /dev/st0


    Note that typically it’s a zero, not a letter o, at the end.

  • Ubuntu: How to write files to a tape


    To put files onto a tape, run the following:


    tar -cvf /dev/[path to tape] [file or directory] [file or directory] [file or directory]


    An example would be:


    tar -cvf /dev/st0 /home/bob


    This will back up the user bob’s home directory to the tape, here located at /dev/st0 (a typical location – note the zero, not the letter o).


    If you want to use compression in your backup, use the z flag in addition to the other tar flags, such as:


    tar -cvfz /dev/st0 /home/bob


    All done!

  • How to erase a tape in Ubuntu


    This is another nice and easy one, though it may take a while depending on the size/speed of the tape:


    sudo mt -f [/path/to/tape] erase


    e.g.:


    sudo mt -f /dev/st0 erase


    That’s /dev/st(zero) not /dev/st(letter o), in case it’s not clear from the font. This will likely take some time as the tape is erased from end-to-end – once it is done you will be returned to a prompt.

  • How to rewind a tape drive in Ubuntu


    This again uses the mt command, and is nice and easy:


    sudo mt -f [path/to/tape/drive] rewind


    A common example would be:


    sudo mt -f /dev/st0 rewind


    Easy done! In the above example it’s st (zero) not st (letter o) – in case it’s not clear from the font.