Tag: ssh tunnel

  • Setting up one browser remotely, one locally


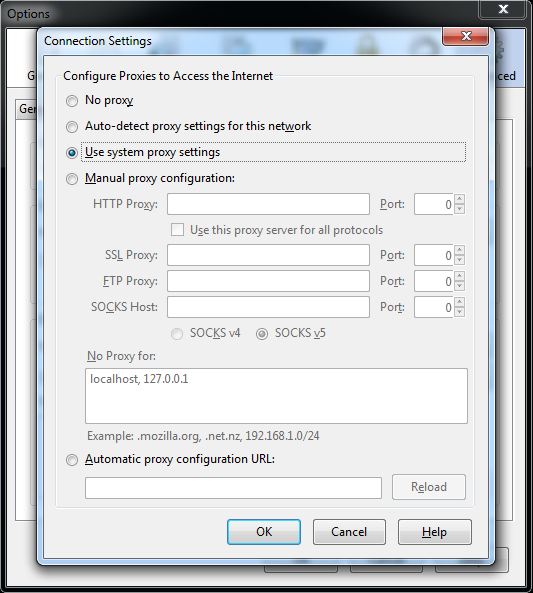
    As a follow-up to the Firefox and Internet Explorer remote browsing articles we were asked whether you could set IE up for remote browsing and Firefox for local browsing. This certainly can be done – set up your tunnel in Internet Explorer then open up Firefox and go to:


    Tools -> Options -> Advanced -> Network -> Settings -> select No Proxy


    Firefox should now work locally again.

  • Using an SSH tunnel with Internet Explorer


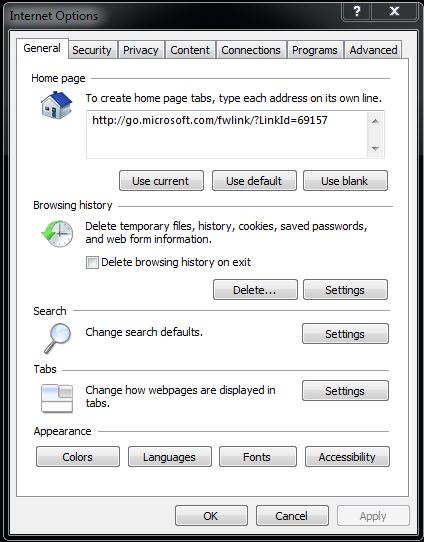
    As a follow-up to the previous article on how to browse the web via an SSH tunnel in Firefox we’ve been asked to show how to do the same with Internet Explorer. The Putty set-up remains the same; once that’s complete, open Internet Explorer (we are using IE 9) and go to Tools -> Internet Options (you may have to hit Alt to bring up the top menu):

    remote-access-ie-01

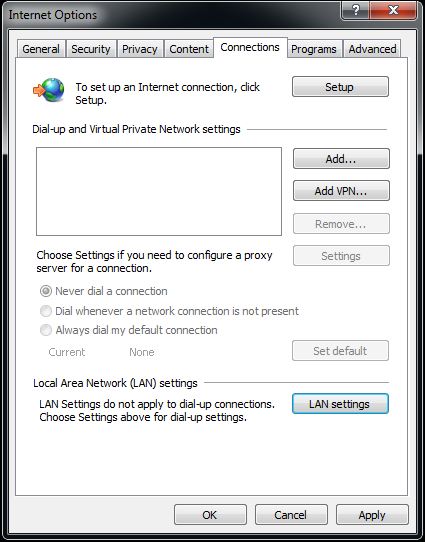
    Go to Settings:

    remote-access-ie-02

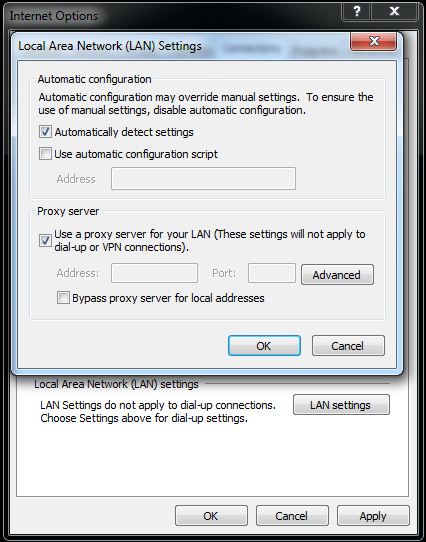
    Choose LAN settings:


    remote-access-ie-03

    Tick “Use proxy server for your LAN” and click Advanced:


    remote-access-ie-04

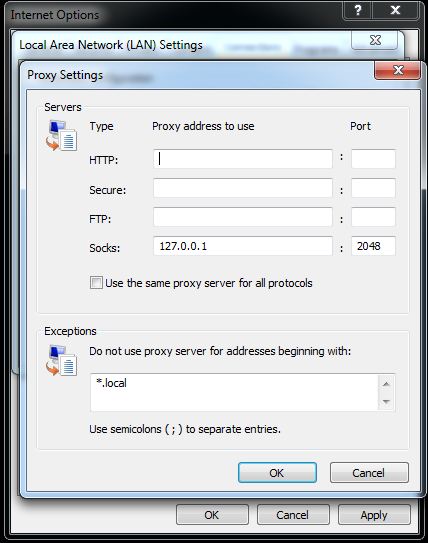
    Make sure the top four lines are blank in all fields except for the SOCKS port – here put:


    127.0.0.1


    and the port we used in Putty:


    2048


    Make sure the “Use the same proxy server for all protocols” box is unticked.


    Hit OK -> OK -> Apply -> OK, open up your SSH tunnel in Putty and you should be ready to browse the internet remotely!

  • Browsing the web through a SSH tunnel with Firefox and Putty (Windows)


    If you have the ability to SSH into a remote machine you also have the ability to direct your web browser’s traffic through SSH to that machine. This can be quite handy for browsing the (remote) local network without opening a HTTP port on the firewall.


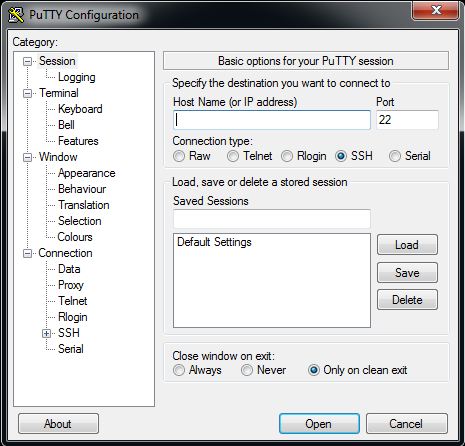
    First, install Putty and Firefox. Putty can be found here and Firefox here. If you’re not sure which file to download for Putty, just go for putty.exe. Once you’ve downloaded Putty, open it and you should see a screen like this:
     

    putty-01


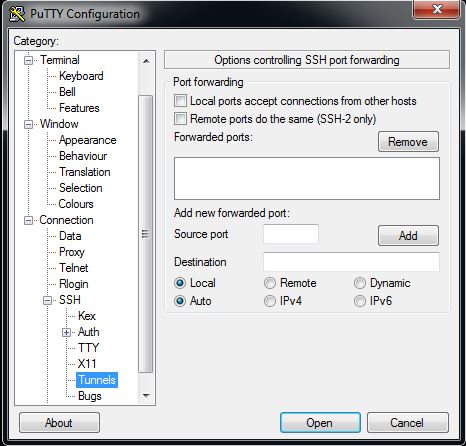
    Enter in the remote computer’s IP address and SSH port number (usually 22 unless you changed it) and test the connection to make sure you can log in. If that works, disconnect and go to Connection -> SSH -> Tunnels like so:
     

    putty-connection-ssh-tunnels


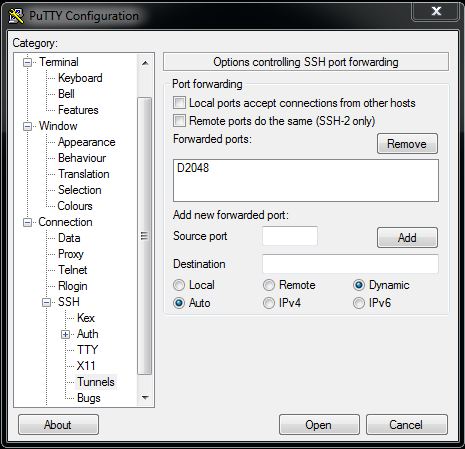
    then change the selection from Local to Dynamic. After that, enter 2048 into the “Source port” field and click Add.  Your screen should now look like:
    putty-source-port


    Note the D in front of the source port number – that should be there.


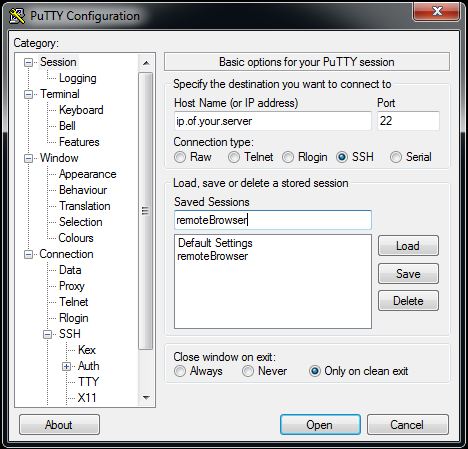
    Scroll back up on the left until you get back to the original Session window. Check the IP address and port numbers and enter a name in the “Saved Sessions” box, then click Save. Now you can load these settings again next time you open Putty.
     

    putty-save-session


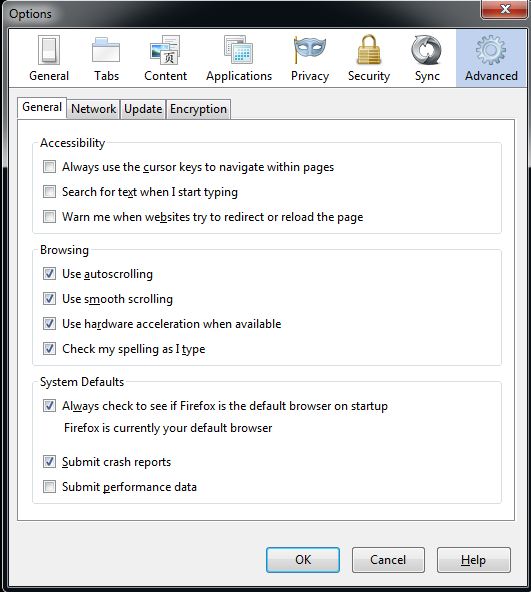
    The version of Firefox we’re using for today’s example is 18.0.2. Go to Tools -> Options -> Advanced (you may have to hit Alt to bring up the Tools menu at the top):
     

    firefox-options-for-remote-browsing


    Now choose Network then Settings. You should see a window like this:


    putty-save-session firefox-settings-for-remote-browsing


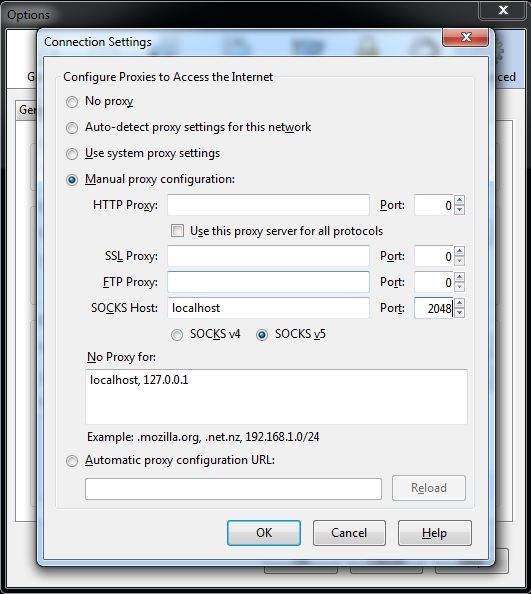
    Now choose “Manual proxy configuration” and enter localhost in SOCKS Host, and 2048 in the corresponding Port field like so:
     

    firefox-socks-settings-for-remote-browsing


    Click OK then again on the previous screen, open your Putty connection and the next URL you enter should be tunneled through to your remote server! To undo this, simply go into Firefox and put the above screen back to “Use system proxy settings”.