Tag: ZFS

  • ZFS on Linux: How to find the arc stats (was arcstat.py)

    This has now changed; run the following to find the adaptive read cache stats (ARC):


    cat /proc/spl/kstat/zfs/arcstats


    You can gleam some really useful information out of how your RAM is being utilised and what your required ARC size might be from the results – this may be a topic for a future post, however!

  • ZFS: zpool replace returns error: cannot replace, devices have different sector alignment

    Trying to replace a failed SSD in a zpool we encountered the following error:


    cannot replace 4233944908106055 with ata-INTEL_SSDSC2BW240A4_CVD02KY2403GN: devices have different sector alignment


    The pool was aligned to 4k sectors – e.g. ashift=12 – whereas the new SSD was aligned to 512b sectors. There’s a quick and easy fix to this – no need to use partitioning tools:


    (more…)

  • ZFS on Linux: Zpool import failed

    We upgraded a Proxmox box today which was running ZFS and ran into this rather scary looking error:


    zpool: ../../lib/libzfs/libzfs_import.c:356: Assertion `nvlist_lookup_uint64(zhp->zpool_config, ZPOOL_CONFIG_POOL_GUID, &theguid) == 0′ failed.


    Zpools would not import and zpool status did not work. Resolved (so far, anyhow, still testing) by running:


    apt-get install zfsutils


    Another good reason to have test environments…

  • ZFS: Adding a new mirror to an existing ZFS pool


    Mirrored vdevs are great for performance and it is quite straight-forward to add a mirrored vdev to an existing pool (presumably one with one or more similar vdevs already):


    zpool add [poolname] mirror [device01] [device02] [device03]


    If it’s a two-way mirror you will only have two devices in the above. An example for ZFS on Ubuntu with a pool named seleucus and two SSDs could look like:


    zpool add seleucus mirror ata-SAMSUNG_SSD_830_Series_S0XYNEAC705640 ata-M4-CT128M4SSD2_000000001221090B7BF9


    As always, it’s good practice to use the device name found in /dev/disk/by-id/ rather than the sda, sdb, sdc etc. names as the latter can change – the former do not.

  • ZFS on Linux (Ubuntu) – arcstat.py is now available! How do you run it?

    UPDATE: This information is now out of date, see new post here.


    One very handy ZFS-related command which has been missing from the standard ZFS on Linux implementation has been arcstat.py. This script provides a great deal of useful information about how effective your adaptive read cache (ARC) is.


    ZFSoL 0.6.2 includes it, which you can now update to in Ubuntu with apt-get upgrade. But how do you actually use it when you upgrade? Easy. Assuming you have python installed, run the following (this works for 13.04 at least – we will check the others and update when we do):


    /usr/src/zfs-0.6.2/cmd/arcstat/arcstat.py


    This will provide you with the default readout, e.g. for our system which just rebooted:


        time  read  miss  miss%  dmis  dm%  pmis  pm%  mmis  mm%  arcsz     c

    21:33:13     3     1         33          1       33        0        0           1        33       2.5G   15G


    As you can see, since the system has just rebooted and hasn’t started caching requests the ARC size is quite small – 2.5G.

    This is an extremely useful tool to get an idea of how your ARC is performing – we will do a piece on interpreting the results soon!

  • ZFS: Renaming a zpool


    If you’ve imported a pool from another system and want to change the name or have just changed your mind, this is actually quite straightforward to do. Run the following (as root):

    zpool export [poolname]

    As an example, for a pool named tank which we wish to rename notankshere:

    zpool export tank

    Then run:

    zpool import [poolname] [newpoolname]

    e.g.:

    zpool import tank notankshere


    The pool will be imported as “notankshere” instead.

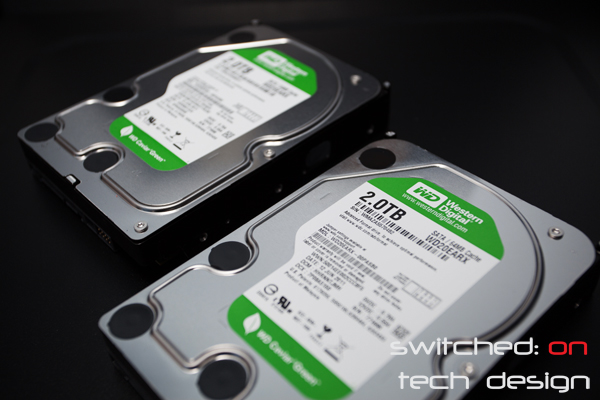
  • Western Digital Green drive resilver rates


    western-digital-green-drives


    We get asked fairly regularly about resilver rates for ZFS pools – these matter as it impacts on how quickly a vdev with faulty disks can rebuild data onto a fresh disk, as well as how quickly you can swap one disk for another. The longer it takes to rebuild the vdev after a disk has died, the longer your pool is operating with less redundancy – meaning that if you have had one disk fail (raidz1) or two disks fail (raidz2) already then one more failure before it has finished rebuilding will cause the vdev and zpool to fail.


    Today we have been tasked with swapping new drives into two 6-disk vdevs, each consisting of a mixture of WD20EARX and WD20EARS drives – Western Digital 2TB green drives. One array contains 8TB of information, the other 5TB. The 5TB array fluctuates around 245MB/s resilver rate, and the 8TB fluctuates around 255MB/s – giving around 6 hours and 9 hours rebuild times respectively.


    These figures are what we would consider typical for that size of vdev, given the disks involved. We will post more rebuild rates and add them into a database over time – stay tuned 🙂

  • ZFS on Ubuntu error: Failed to load ZFS module stack


    If you see the above error in a fresh installation of ZFS on Ubuntu one cause may be that the package build-essentials wasn’t installed prior to installing the ubuntu-zfs package; run:


    sudo apt-get purge ubuntu-zfs


    then check for the remaining packages with the following:


    dpkg –list | grep zfs


    …and apt-get purge any remaining relevant ZFS packages.


    Then:


    sudo apt-get install build-essential


    …then install ubuntu-zfs as you did originally:


    sudo apt-get install ubuntu-zfs


    This time it should take properly. This isn’t the only cause of that error but on a fresh install with a new OS it’s one possibility.

  • ZFS: How to change the compression level

    By default ZFS uses the lzjb compression algorithm; you can select others when setting compression on a ZFS folder. To try another one do the following:


    sudo zfs set compression=gzip [zfs dataset]


    This changes the compression algorithm to gzip. By default this sets it to gzip-6 compression; we can actually specify what level we want with:


    sudo zfs set compression=gzip-[1-9] [zfs dataset]


    e.g.


    sudo zfs set compression=gzip-8 kepler/data


    Note that you don’t need the leading / for the pool, and that you can set this at a pool level and not just on sub-datasets. 1 is the lowest level of compression (less CPU-intensive, less compressed) where gzip-9 is the opposite – often quite CPU intensive and offers the most compression. This isn’t necessarily a linear scale, mind, and the type of data you are compressing will have a huge impact on what sort of returns you’ll see. Try various levels out on your data, checking the CPU usage as you go and the compression efficiency afterwards – you may find that 9 is too CPU-intensive, or that you don’t get a great deal of benefit after a certain point. Note that when you change the compression level it only affects new data written to the ZFS dataset; an easy way of testing this is to make several sets, set a different level of compression on each and copy some typical data to them one by one while observing. We discussed checking your compression efficiency in a previous post.


    Compression doesn’t just benefit us in terms of space saved, however – it can also greatly improve disk performance at a cost of CPU usage. Try some benchmarks on compression-enabled datsets and see if you notice any improvement – it can be anywhere from slight to significant, depending on your setup.

  • ZFS: Replacing a drive with a larger drive within a vdev

    One way to expand the capacity of a zpool is to replace each disk with a larger disk; once the last disk is replaced the pool can be expanded (or will auto-expand, depending on your pool settings). To do this we do the following:


    zpool replace [poolname] [old drive] [new drive]


    e.g.:


    zpool replace kepler ata-WDC_WD15EARX-00PASB0_WD-WCAZAA512624 ata-WDC_WD20EARX-00PASB0_WD-WCAZAA637471

    If you then check on the pool’s status via zpool status, we see:


    NAME                                            STATE     READ WRITE CKSUM
    kepler                                          ONLINE     0     0     0
    raidz2-0                                      ONLINE     0     0     0
    ata-WDC_WD20EARX-00PASB0_WD-WMAZA7352703    ONLINE       0     0     0
    replacing-1                                 ONLINE     0     0     0
    ata-WDC_WD15EARX-00PASB0_WD-WCAZAA512624  ONLINE      0     0     0
    ata-WDC_WD20EARX-00PASB0_WD-WCAZAA637471  ONLINE       0     0     0  (resilvering)


    The pool will resilver and copy the drive contents across. If you have large drives which are reasonably full this resilver process can take quite a few hours. You can do this with multiple drives at once; here’s a zpool


            NAME                                            STATE     READ WRITE CKSUM
    kepler                                          ONLINE     0     0     0
    raidz2-0                                      ONLINE     0     0     0
    ata-WDC_WD20EARX-00PASB0_WD-WMAZA7352703    ONLINE       0     0     0
    replacing-1                                 ONLINE     0     0     0
    ata-WDC_WD15EARX-00PASB0_WD-WCAZAA512624  ONLINE      0     0     0
    ata-WDC_WD20EARX-00PASB0_WD-WCAZAA637471  ONLINE       0     0     0  (resilvering)
    replacing-2                                 ONLINE       0     0     0
    ata-ST2000DM001-9YN164_W24009TB           ONLINE       0     0     0
    ata-WDC_WD20EARS-00MVWB0_WD-WCAZAC389099  ONLINE       0     0     0  (resilvering)
    ata-WDC_WD20EFRX-68AX9N0_WD-WMC300005367    ONLINE       0     0     0
    ata-WDC_WD20EARX-00MMMB0_WD-WCAWZ0842974    ONLINE       0     0     0
    ata-WDC_WD20EARX-00PASB0_WD-WMAZA7482198    ONLINE       0     0     0

    Please don’t disconnect the old drive before inserting the new one – this can cause issues with some setups where ZFS complains that it cannot find the old drive to replace.


    Once your resilver is complete on the final drive you can expand the vdev by running:


    zpool online -e [poolname]


    or you can turn on automatic expansion with the following settings:


    zfs set autoexpand=on [poolname]


    If you are using zpool online -e the pool does not have to be offline for it to work. Now sit back and enjoy your increased space!