Category: How-To

  • Ubuntu: How to view results of “ls” one page at a time

    If you’re listing the contents of a directory using the “ls -l” command in a terminal window you may find that the number of results cause pages of text to fly past your screen, leaving you with only the last page to look at. If you aren’t using a terminal which you can scroll back through this can be rather annoying; fortunately, there’s an easy fix.


    In a nutshell you can direct the output of the ls command to another command – less – which allows you to view the results one page at a time. We do this using a pipe: the | symbol.


    ls -l | less


    The less command shows you one screen at a time; to see the next screen, press the spacebar. If you would like less at once, you can see the next single line using the return key. You can go back a screen by pressing the “b” key or half a screen with the “u” key. There are plenty of other useful commands within less – you can see the manual for it by typing:


    man less


    You can navigate the manual in the same way – spacebar for another screen, u and b to move back up!


  • ZFS: Stopping a scrub

    If you accidentally started a scrub on a pool or need to stop one for any reason it’s fortunately quite straightforward:


    # zpool scrub -s [poolname]


    e.g. zpool scrub -s kepler


    You can check on whether that was successful with zpool status – it will give an output above the pool status that looks like:


    pool: kepler
    state: ONLINE
    scan: scrub canceled on Sat Sep 29 10:30:14 2012


    Unnecessary scrubbing just wastes power – particularly for a large, nearly-full array where you’ll have quite a few disks running constantly for hours – so it’s good practice to cancel an accidentally-started scrub.

  • Fractal Design Define R4: Does a Corsair H100 cooler fit in the front?


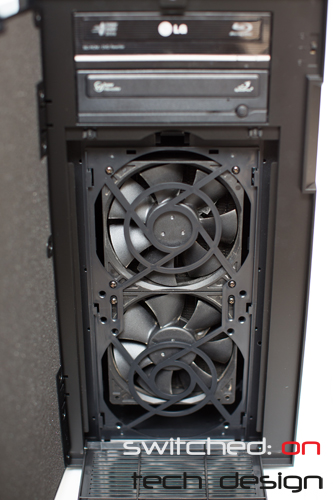
    With the release of the Fractal Design Define R4 we have been asked a few times about whether Corsair’s self-contained liquid cooling system will fit in the front. Placement here has a few advantages over placing it in the top of the chassis; noise is reduced, for a start, and if you use the top as an intake you lose the inbuild dust filters. You could use the H100 in an exhaust configuration in the top position but temperatures will not be as good as you will be drawing in warm air from inside the chassis to cool the CPU rather than the cooler, outside air.


    That leaves the front as an ideal position from the perspective of noise and cooling; the Define R3 did not allow this placement without drilling out the front drive bays. Since the R4 allows you to remove the front drive trays without permanently modifying the chassis, how does the H100 fare in terms of fit?


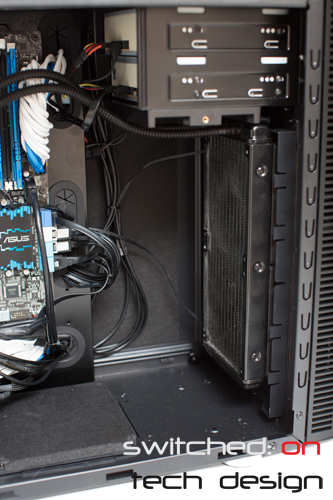
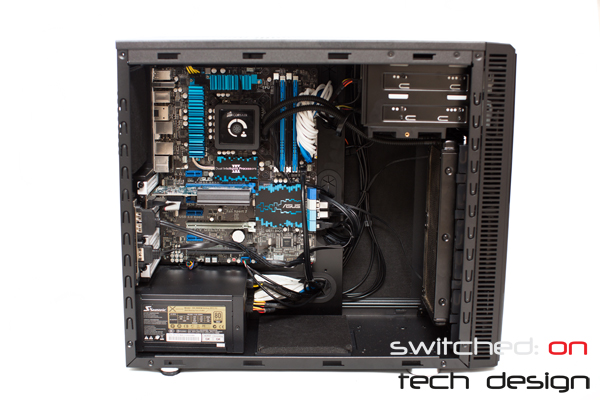
    As it turns out, it fits beautifully:


    Given that the front has been upgraded to allow the placement of 140mm fans as well as 120mm fans there’s a little bit of space below the cooler; this hasn’t proven to be an issue in our testing though you could easily put a baffle in (foam, tape etc.) if it bothered you. You can see the coolant tube placement here:


    There’s a reasonable amount of slack there – it’s definitely not applying an undue amount of pressure on the tubes.


    From the front we can see:


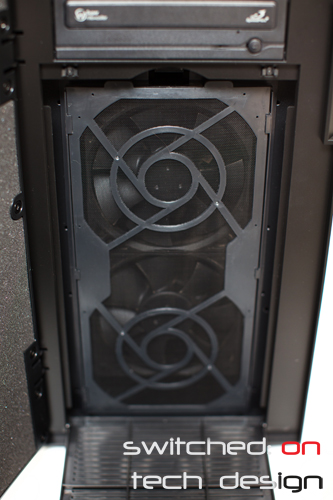
    You can see the gap at the bottom (and a slight one at the sides) more clearly here. For those concerned about aesthetics, you can’t see anything when the filters are back in place:


    Comparing the top to the front mounting in practice the front is notably quieter – and temperatures are a few degrees better, which may be important if you’re pushing the boundaries with the all-in-one units and don’t want to go to a full-blown watercooling setup. It’s well worth the effort to install it in the front rather than top if you don’t need the 3.5″ bays!

  • Fractal Design Define R4: Removing all of the front drive trays


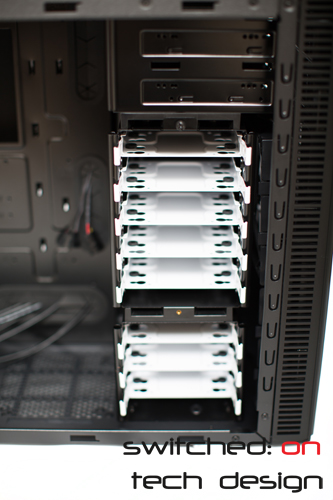
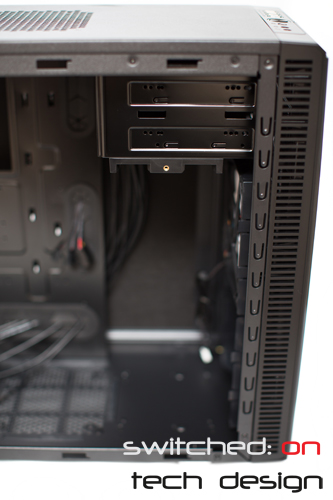
    Someone asked how we removed the hard drive bays in the Fractal Design R4 builds we’re doing at the moment, so we wrote up a quick post for those who are wondering. If you want to install a radiator to the front of the R4 or are simply using a handful of SSDs and have no need for the 3.5″ drive bays you may wish to remove them; unlike the R3, where they’re riveted in place, the R4 features entirely removable drive bays.


    Remove the thumbscrews on the front and the topmost tray will just slide out:


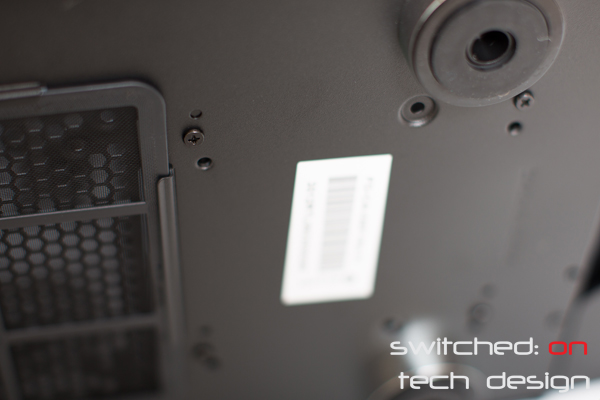
    This will leave you with plenty of room to install almost any graphics card you might care to; it also improves airflow from the front uppermost fan as there’s nothing blocking the airflow. The second set of drive trays is a little trickier; have a look under the case for the first set of screws attaching it:


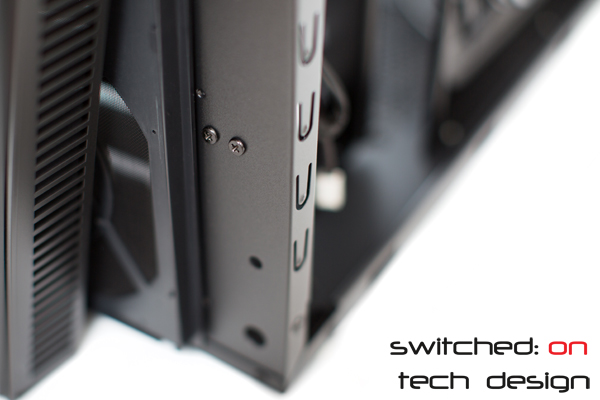
    There are four in total here, two of which are clear in the photo. Once they’re removed, unclip the front panel by pressing out the plastic pins that hold it in and you’ll see the front screws holding in the drive tray:


    There are only the two you see in the photo here. Once they’re removed, the drive tray lifts right out.


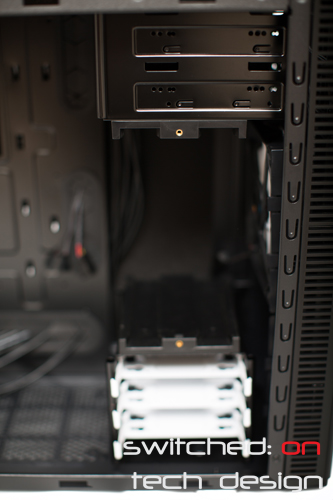
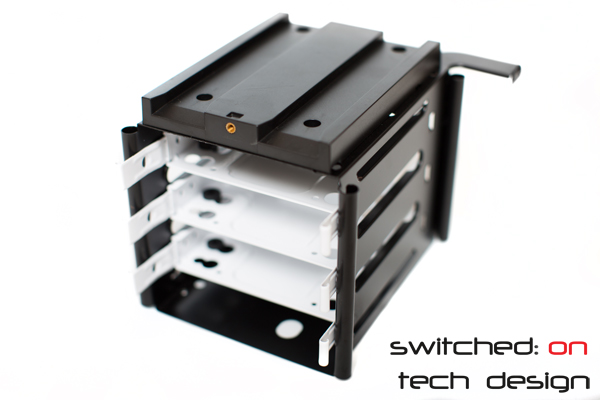
    …and the top one:


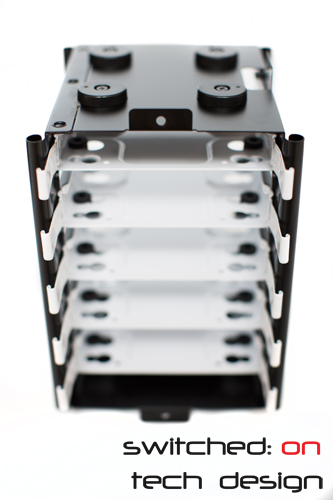
    They’re quite sturdy little units themselves and could certainly be re-purposed elsewhere should you have a need for drive trays!


    Now we have a front chassis that’s empty – until you install a radiator, that is… here’s a view of the newfound free space:


    Happy disassembling!

  • How to add a drive to a ZFS mirror

    Sometimes you may wish to expand a two-way mirror to a three-way mirror, or to make a basic single drive vdev into a mirror – to do this we use the zpool attach command. Simpy run:


    # zpool attach [poolname] [original drive to be mirrored] [new drive]

    An example:


    # zpool attach seleucus /dev/sdj /dev/sdm


    …where the pool is named seleucus, the drive that’s already present in the pool is /dev/sdj and the new drive that’s being added is /dev/sdm. You can add the force switch like so:


    # zpool attach -f seleucus /dev/sdj /dev/sdm


    to force ZFS to add a device it thinks is in use; this won’t always work depending on the reason why the drive is showing up as being in use.


    Please note that you cannot expand a raidz, raidz1, raidz2 etc. vdev with this command – it only works for basic vdevs or mirrors. The above drive syntax is for Ubuntu; for Solaris or OpenIndiana the drive designations look like c1t0d0 instead, so the command might look like:


    # zpool attach seleucus c1t1d0 c1t2d0


    …instead.


    This is a handy command if you want a three-way mirror but don’t have all three drives to start with – you can get the ball rolling with a 2-way mirror and add the third drive down the track. Remember that ZFS performs reads in a mirror in round-robin fashion, so that while you get a single drive’s performance for writes you will get approximately the sum of all of the drives in terms of read performance – it’s not hard for a 3-way 6gb/s SSD mirror to crack 1,500MB/s in sequential reads. It’s a fantastic way to get extreme performance for a large number of small VMs.


  • ZFS Basics – zpool scrubbing

    One of the most significant features of the ZFS filesystem is scrubbing. This is where the filesystem checks itself for errors and attempts to heal any errors that it finds. It’s generally a good idea to scrub consumer-grade drives once a week, and enterprise-grade drives once a month.


    How long the scrub takes depends on how much data is in your pool; ZFS only scrubs sectors where data is present so if your pool is mostly empty it will be finished fairly quickly. Time taken is also dependent on drive and pool performance; an SSD pool will scrub much more quickly than a spinning disk pool!


    To scrub, run the following command:


    # zpool scrub [poolname]


    Replace [poolname] with the name of your pool. You can check the status of your scrub via:


    # zpool status


    The output will look something like this:


    pool: seleucus
    state: ONLINE
    scan: scrub in progress since Tue Sep 18 21:14:37 2012
    1.18G scanned out of 67.4G at 403M/s, 0h2m to go
    0 repaired, 1.75% done
    config:

    NAME        STATE     READ WRITE CKSUM
    seleucus    ONLINE       0     0     0
    mirror-0  ONLINE       0     0     0
    sdh     ONLINE       0     0     0
    sdk     ONLINE       0     0     0

    errors: No known data errors


    Scrubbing has a low priority so if the drives are being accessed while the scrub is happening there should be less impact on performance. It’s a good idea to automate the scrubbing process in case you forget – we will do a later post on just how to do that!

  • ZFS folders on Ubuntu not mounting after reboot

    After upgrading to 12.04 people seem to be finding that their ZFS shares aren’t mounting on boot; this has an easy fix, fortunately – edit your /etc/rc.local file and add:


    stop smbd

    stop nmbd

    zfs mount -a

    start smbd

    start nmbd


    Save and reboot and your shares should be intact. This has worked on all of the systems we’ve tested it on so far.

  • How to find kernel version in Ubuntu 12.04 Precise Pangolin

    Note: This also works in other versions of Ubuntu, such as 11.10, 11.04, 10.10, 10.04 and earlier.


    Sometimes you may wish to find out which kernel you’re  currently running; fortunately, this is quite easy to do with the uname command. If you’re running Ubuntu Desktop, open up a Terminal; if you’re using Ubuntu Server log in as per usual and then run:


    uname -v

    …for the kernel version, or:


    uname -r

    for the kernel release. You can combine the two and use:


    uname -rv

    to see both of those with the one command.

  • How do you tell which zpool version you are running?

    This is a question that crops up fairly regularly, as different operating systems support different zpool versions. Fortunately, it’s quite easy to find out which versions you are running – simply run:


    # zpool upgrade


    If you want a more detailed readout, including the features of the pool version you have, try:


    # zpool upgrade -v


    Your output should look something like this:


    # zpool upgrade -v
    This system is currently running ZFS pool version 28.

    The following versions are supported:

    VER  DESCRIPTION
    —  ——————————————————–
    1   Initial ZFS version
    2   Ditto blocks (replicated metadata)
    3   Hot spares and double parity RAID-Z
    4   zpool history
    5   Compression using the gzip algorithm
    6   bootfs pool property
    7   Separate intent log devices
    8   Delegated administration
    9   refquota and refreservation properties
    10  Cache devices
    11  Improved scrub performance
    12  Snapshot properties
    13  snapused property
    14  passthrough-x aclinherit
    15  user/group space accounting
    16  stmf property support
    17  Triple-parity RAID-Z
    18  Snapshot user holds
    19  Log device removal
    20  Compression using zle (zero-length encoding)
    21  Deduplication
    22  Received properties
    23  Slim ZIL
    24  System attributes
    25  Improved scrub stats
    26  Improved snapshot deletion performance
    27  Improved snapshot creation performance
    28  Multiple vdev replacements

    For more information on a particular version, including supported releases,
    see the ZFS Administration Guide.


    Or for the more simple command:
    # zpool upgrade


    This system is currently running ZFS pool version 28.

    All pools are formatted using this version.

  • Proper mounting of Corsair AF120 or SP120 coloured rings


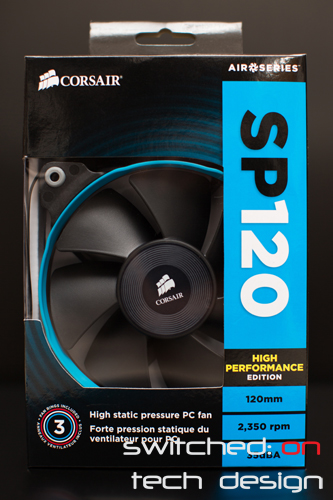
    Can’t get your coloured ring to sit properly on your new Corsair fan? You’re not alone – we’ve had a few customers find it difficult getting their rings to sit correctly in the fans.


    (more…)