With the recent release of Intel’s Haswell-EP (aka Grantley) range of CPUs we have a new assortment of motherboards to match. One of the Supermicro server offerings is the X10SRH-CLN4F single-socket (UP, as opposed to dual socket – DP) board.
With the recent release of Intel’s Haswell-EP (aka Grantley) range of CPUs we have a new assortment of motherboards to match. One of the Supermicro server offerings is the X10SRH-CLN4F single-socket (UP, as opposed to dual socket – DP) board.
Welcome to Part 01 of our Asus DSL-AC68U modem router review! This is Asus’ latest effort and it sports a pretty impressive spec sheet;
If you are looking for just a wireless router and don’t need the ADSL portion, try the Asus RT-AC68U. The DSL-AC68U follows Asus’ recent industrial design;
Quite striking if you ask us! Taking a look at the rear:
On the left hand side we have – in clockwise order – the USB 3.0 port, ADSL connection, power connector, power switch and recessed reset switch:
On the other side we have four gigabit ports:
Decorative ASUS logo in the center:
The right side is totally button-free, and the left holds a Wi-Fi on/off and WPS button:
Moving to the top, we have the three antenna ports:
And in the box, three adjustable antennas:
Other goodies in the box include an Ethernet cable (not pictured), splitter and telephone line:
…and a compact power brick:
The compact size of the power brick is definitely appreciated, particularly in this day and age of having many, many electronic devices plugged into power boards! Now a side view showing the built-in foot and device profile:
But back to the spec sheet. The DSL-AC68U can hook up to either an ADSL/ADSL2/2+/VDSL or fibre/cable through a WAN port; appealing to those who may have access to both over the life of the product. Certainly a feature which could be appealing for those who are currently on an ADSL exchange but are looking at having fibre installed to their home in the next year or two.
The Dual CPU feature involves one dedicated CPU for the ADSL/VDSL and one for Wi-Fi networking; Asus claim that this assists in achieving maximum throughput for both as they are no longer vying for the same CPU time.
The AC1900 claim is not achievable with a single Wi-Fi connection; it adds the 1300MHz theoretical maximum of Wireless AC with the 600MHz theoretical maximum of Wireless N. Wireless AC is appearing in more and more mobiles, tablets, laptops and desktops so it makes a lot of sense to consider a Wireless AC modem/router if wireless speeds matter to you at all. We have found that it can result in greatly improved network performance, particularly when you have multiple people streaming media or files simultaneously.
Asus claim that their AiRadar feature improves just about everything about your Wi-Fi – range, stability and speed. The beamforming benefit isn’t just restricted to AC, either – the older A/B/G/N standards receive it as well.
The USB 3.0 port can be used to share a 3G or 4G dongle’s internet connectivity, a USB drive or a printer. USB 3.0 here is definitely a plus for those with Wireless AC clients and USB 3.0 hard drives/flash drives – you stand a chance of actually seeing the benefit of the faster USB standard thanks to the potential 1Gb+ Wi-Fi speeds.
Stay tuned for part 02 of our review, where we look at the rest of the features and Asus’ ASUSWRT web interface!
Gigabyte recently updated their line of Brix mini-computers to Intel’s Haswell architecture (from Ivy Bridge). Today we have the i5-4200 model (BRIX GB-BXi5-4200) in for testing.
Click through to read the review!
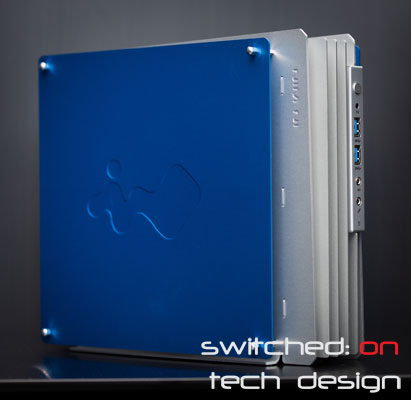
In-Win’s H-frame ITX chassis caught people’s attention in early 2013 for it’s striking looks, and today we got our hands on one to review.
Today we are looking at a new line of drives from Western Digital – the Se range. Click through to read our review of the baby of the new line – a 2TB drive…
We measured the ProCurve 2510-24’s power usage:
Idle: 11.9W
Peak: 14.8W
This was measured on a 240V power circuit with a handful of devices attached (5). The peak wattage was measured during power-on and idle was steady around 11.9W. We would expect power usage to increase as you add more bandwidth-heavy devices; however, now that many of these switches are falling into the hands of home enthusiasts for connecting things like low-bandwidth computers, printers, Raspberry Pis and the like it should stay quite a low figure even with more devices connected.
So, how much does it cost to run? Assuming the minimum power draw is 12W and that electricity costs ~$0.30/KWhr:
Weekly: 2.016KWhr; $0.60
Monthly: 8.064KWhr; $2.42
Annually: 104.832KWhr; $31.45
All up it’s not a particularly expensive device to keep running. If you don’t need gigabit speeds this switch can be an excellent choice for getting a large number of devices onto the same network – 100Mbit is more than enough for browsing, light file sharing and streaming, printing, 100Mbit devices like Raspberry Pis and more.
With the recent release of Intel’s Haswell architecture came new server boards to match. From Asus came the new P9D line, and within that line the Asus P9D-E4/L is the flagship model with quite a comprehensive list of features.
If you’re in the market for a gigabit switch the HP Procurve line has probably come up in your searches. The 1410-16G is a 16-port gigabit switch, unmanaged, that is also fanless and comes with rack-mounting equipment. Oh, and it’s under $100 AU. With a lifetime warranty. That’s a lot of boxes ticked right there.
If you’re used to HP’s 24/48-port rackmount switches the 1410-16G will probably seem quite compact. Meausuring approx. 21 x 11.2 x 4.5cm and weighing ~650gm, it’s certainly not hard to stash away out of sight if needed. The metal chassis helps both with durability and also heat dissipation – and it doesn’t hurt the feeling of quality, either. Jumping straight into the important parts – a closeup of the ports on the front:
Nothing out of the ordinary here – two sets of 8 ports, cable clips facing outward as they should be. To the left there’s the indicator lights:
Pretty self-explanatory there – and the LEDs are quite appropriately bright, easy to see but not lighting up the entire room. Flipping the unit around to look at the back:
Pretty bare back there. A closeup of the main point of interest:
Flipping the unit around to look at the (identical) sides, there’s once again not a great deal to see. Ventilation holes and mounting points for the rack ears. Speaking of rack ears:
They come with all necessary screws and mounting gear. A nice touch – for a lot of home enthusiasts who have a rack 16 gigabit ports may suffice, and this will save a shelf/custom mounting brackets. There’s also wall-mounting hardware supplied:
…and some nice self-adhesive rubbised feet:
The external power brick is reasonably small with a standard 2-pin figure-eight cable going into it:
A closeup of the printed info for anyone who cares:
The unit is silent as you would expect from a fanless unit, and we couldn’t hear any audible hissing/other noises coming from the power brick. In use it’s extremely power efficient, pulling an average of 8W from the wall in use with 14W peak during power-on. It also doesn’t get appreciably hot during use.
As far as performance goes, putting this switch between an iperf client and server showed a steady 945Mbit/s throughput – an excellent result. We weren’t able to test it in a situation where we pumped 16 or 32 gigabits/second through it, which should be where this switch really shines. If our experience with other Procurve switches is anything to go by, this one should be able to deal with very long periods of uptime without issue. We tested this one for three weeks with constant use and it remained trouble-free.
Given the price point – at or below $100 delivered – the features of this switch make for a compelling product for anyone looking for an unmanaged gigabit switch with 16 ports. Well worth considering.
Looking for an easier way of testing IDE drives than hooking them up inside your case every time? Leaving the side of your case open and having them on your desk may work but isn’t the prettiest solution. The easiest answer if you have a spare 5.25″ bay? One of these.
These come up on eBay for around $20 shipped quite regularly and fit into a standard 5.25″ bay. Let’s take a closer look:
Handle, keylock, two LED indicators… and a sticker advertising the blazing speed of ATA133. How about the rear?
Tiny, noisy Sunon fan, a standard IDE port and a Molex 4-pin power connector. Grabbing the handle and pulling towards you brings the tray out and leaves:
Aluminium. The whole unit doesn’t weigh much less than a kilo – it’s solid stuff. You can see the guide rails that keep the drive caddy from bending pins. Taking a closer look at the PCB at the rear:
Not much more to say about that. So how about the caddy? Let’s slide the top off and take a look:
Screw-holes along the sides, an IDE cable, a Molex power cable and removable top and bottom parts (this view is actually from the bottom up).
Not much changes when viewed from the front…
On the side you can see the matching guide rail and the slide-on section left in-place (the matching one has been removed so we can look in). The rear of the caddy:
That’s some lovely colourful wire there, and some pins to match the receiving end on the rest of the chassis. Time to add a drive:
Eagle-eyed readers will notice the build date of November 2002. A wider view, drive in-situ:
Put the top casing back, slide into the chassis, boot up your computer and you’re good to go. Assuming you’ve screwed the rest of the chassis into your case and hooked up power and data cabling, of course.
We use a similar one for testing, recovering data from and benchmarking IDE drives – for the cost it’s well worth the time savings if you have to deal with them regularly. It’s much quicker and neater than opening up a case each time – unless you use an open case, of course. These items are probably becoming less and less relevant a time passes (and more IDE drives die/are thrown out!) but for those of us who are asked to deal with them, it may well be worth a look.
Wireless access points can be really handy devices – they can solve a number of problems such as connecting a PC/device without a wireless card to the network, creating a network bridge or extending your network. This TP-link, at around $30, offers quite a bit of potential for not a lot of money.
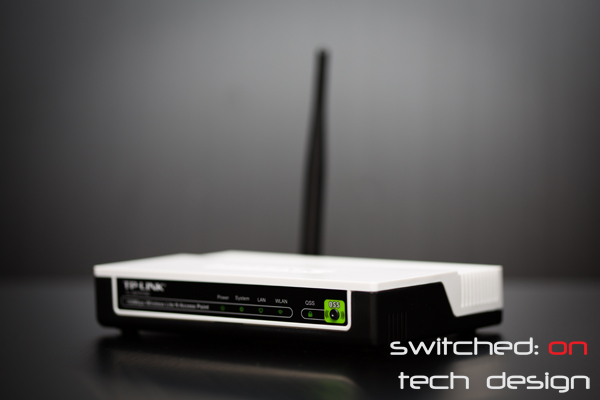
Physically it’s quite a small box with a single LAN port in the back:
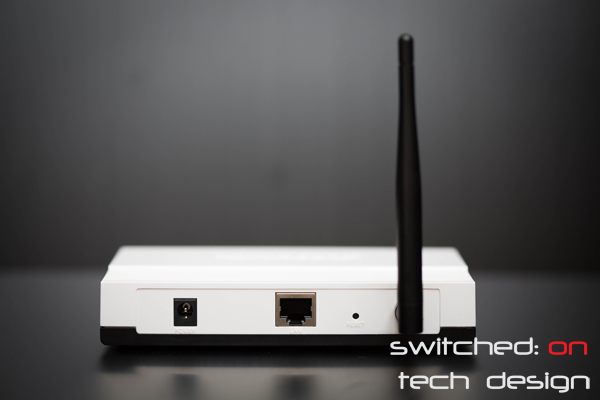
You can also see the power point on the left and the recessed reset button on the right. There’s a single antenna which can be bent into a variety of positions. It does come with a Power over Ethernet adapter, though, which is a nice inclusion for the price – this means that you aren’t limited to placing this device near a power point as you can feed power into the Ethernet line going into it instead!
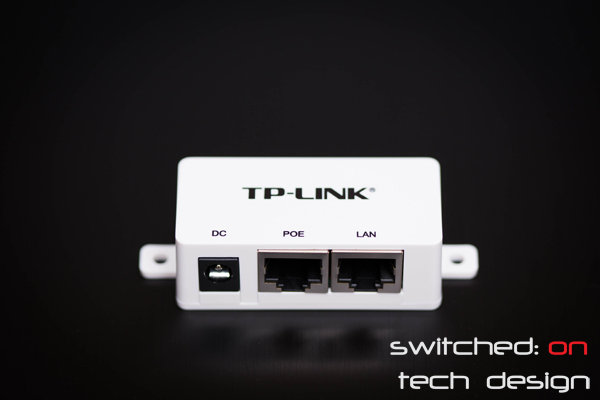
It uses the regular power brick so nothing else is required to get POE going. On first boot the TL-WA701ND has the default IP address of 192.168.1.254, so if you’re using a different IP address range (e.g. 10.1.1.x) you’ll have to change a device to be able to log in and change the static IP of the device to match your own network. The default login is admin/admin – don’t forget to change this! Once you log in you should see the following screen:
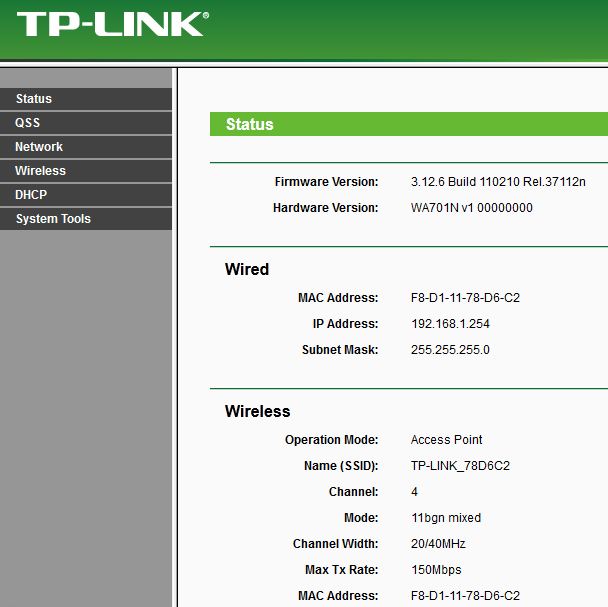
The TL-WA701ND defaults to Access Point mode, as you can see. If you need to you can jump straight to the Network menu to change the IP range:
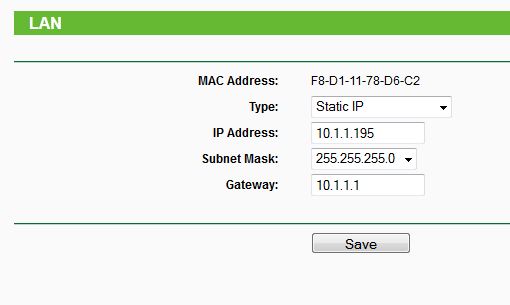
Replace 10.1.1.x with whatever IP address you require. Click save, reboot the router, put your computer back to your usual IP address range and log in again:
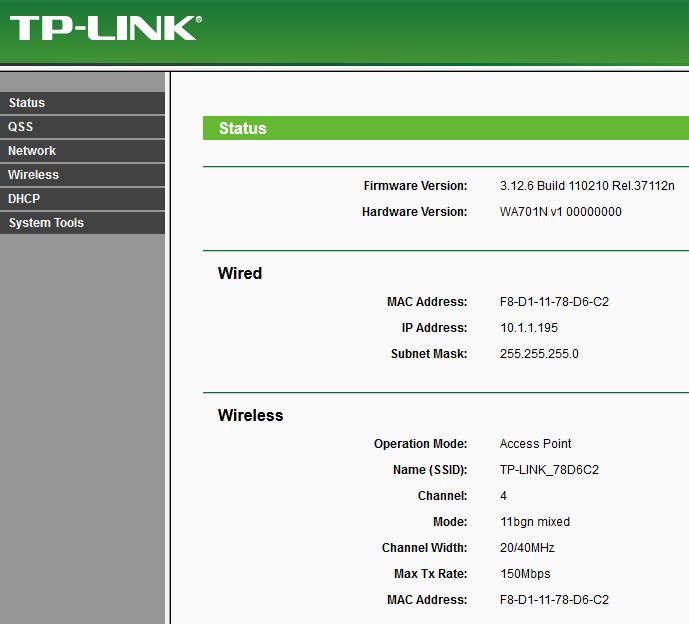
Easy done. On the same screen at the bottom you can see traffic statistics:

Now on to the Wireless menu:
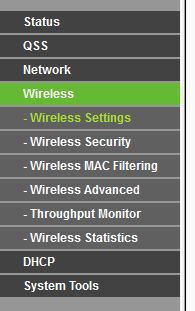
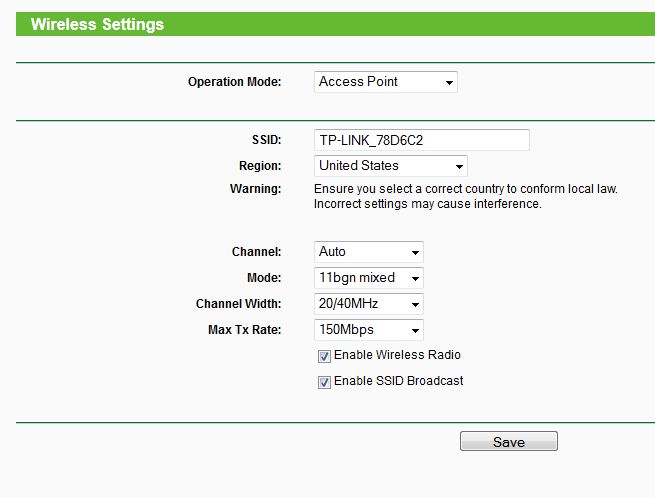
Your choices of Mode are Access Point, Multi-SSID, Client, Repeater, Universal Repeater and Bridge with AP – quite a flexible range of options! The other important page for setting this device up is the Wireless Security page:
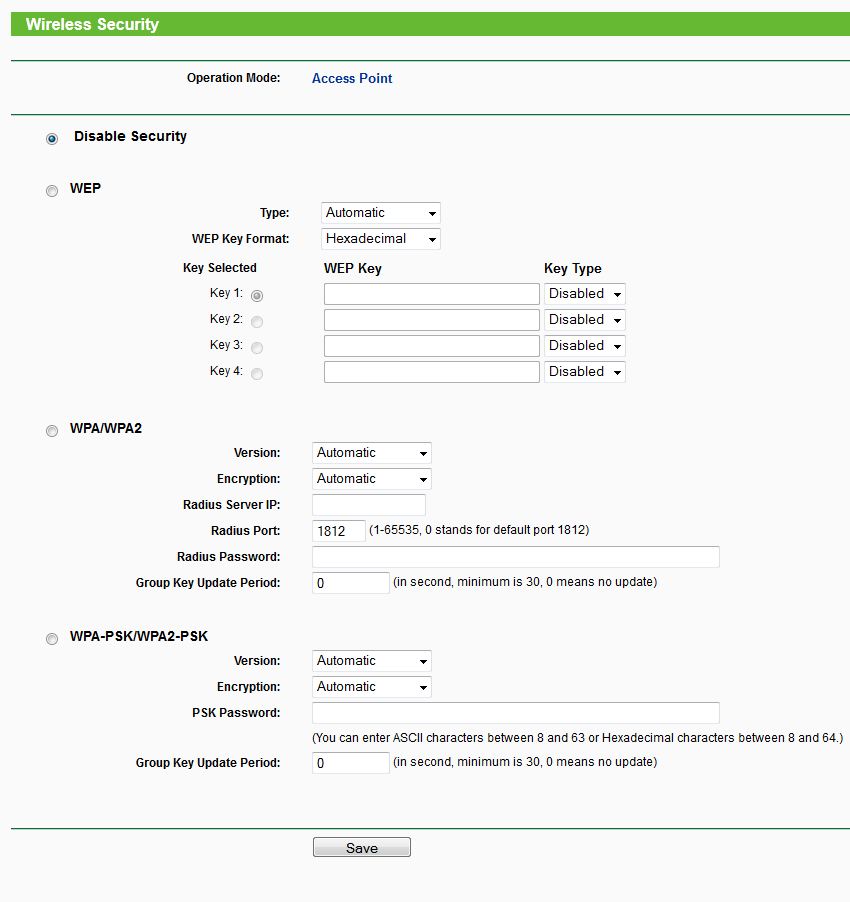
While I certainly wouldn’t encourage anyone to use WEP when WPA2 is available it can sometimes be handy for non-mission-critical situations where you have to connect devices which don’t support WPA. If your devices do support WPA, though, it’s a much more secure protocol and is the better choice. Also on the topic of security, you can filter access by MAC address:
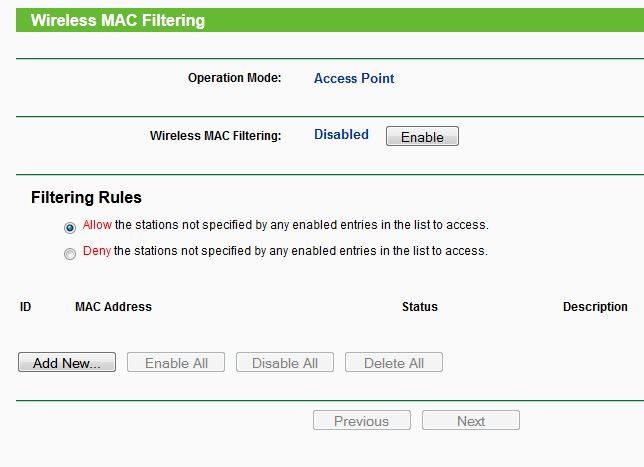
If you’re looking for more control over the wireless aspect of the device, there’s an advanced menu for Wireless settings:
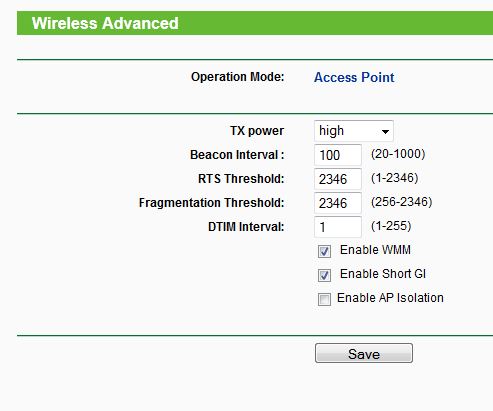
Most users won’t have to touch this, however. Moving on down the menu, we can see our DHCP settings:
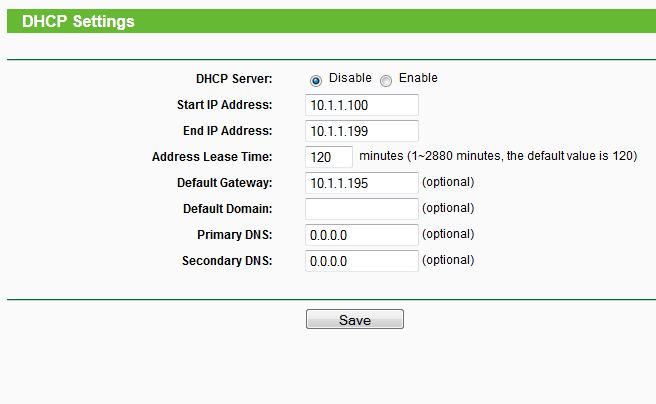
It picks reasonably sensible ranges by default. The System Tools menu is next, and contains the following:
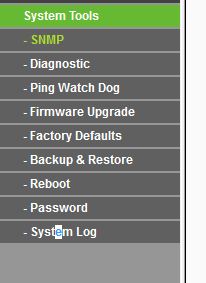
SNMP is a nice inclusion for home enthusiasts or businesses who want/need to keep track of their devices. Another interesting function is the Ping Watch Dog Utility:

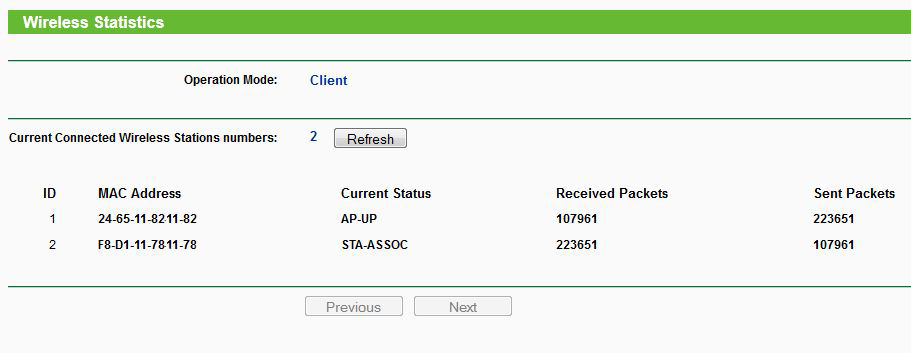
I doubt most people would use it but someone may find it useful! Probably more useful is the Wireless Statistics, which shows each connected device’s usage:
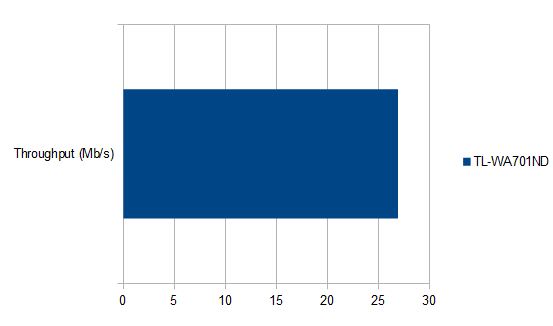
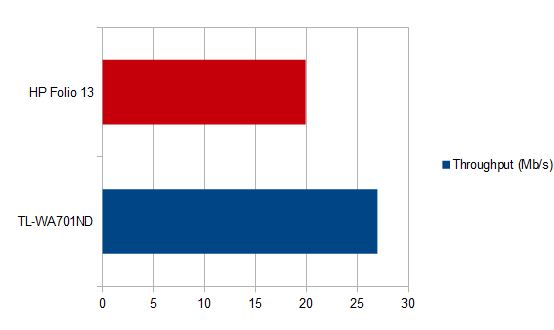
So, that’s what the OS has to offer – so how does it perform? For this test we used iperf on a laptop attached to the TL-WA701ND in Client mode, simulating a device which lacks a wireless card being added to the wireless network. The wireless network was broadcasted from a Fritzbox 7390 through one wall about 5 meters/15 feet away. The laptop is a current-generation HP Folio 13 Ultrabook. The test was ran three times and the average result taken. So how did it go?
