Tag: esxi

  • ESXi: Entering and exiting maintenance mode via command line


    Following on from yesterday’s post, here is how to enter or leave maintenance mode on an ESXi host via SSH:


    vim-cmd hostsvc/maintenance_mode_enter


    to go into maintenance mode – and to leave it:


    vim-cmd hostsvc/maintenance_mode_exit


    If you’re interested in other useful commands, you can see more hostsvc options by running:


    vim-cmd hostsvc


    This is a useful command to know as it is one of the critical steps in applying some patches to ESXi remotely.

  • ESXi: Determining maintanance mode status from the command line


    If you need to know if a host is in maintenance mode via the command line, SSH into your server and run the following:


    vim-cmd hostsvc/hostsummary | grep -i maintenance


    This will return the following line (in this example the host is NOT in maintenance mode):


     inMaintenanceMode = false,

    To see the entire host summary printout without filtering everything apart from maintenance, run:


    vim-cmd hostsvc/hostsummary


    …but you’ll soon see why grep is useful here!

  • How to find which version of ESXi you’re running from the command line?


    If you’re remotely logging in to a server to apply the latest patch but can’t remember whether you’re running 4, 4.1, 5.0 or 5.1 – and it can certainly happen when you’re managing quite a few of them remotely – there is a handy command to see which version and build number you’re actually using. After you’ve SSH’d in, run:


    vmware -v


    This will display output along the lines of the following:


    VMware ESXi 5.0.0 build-469512


    You can also use:


    vmware -l


    which doesn’t display the build number:


    VMware ESXi 5.0.0 GA


    Straightforward but very handy if you haven’t got the proper notes with you.

  • ESXi: Accessing datastores via web browser


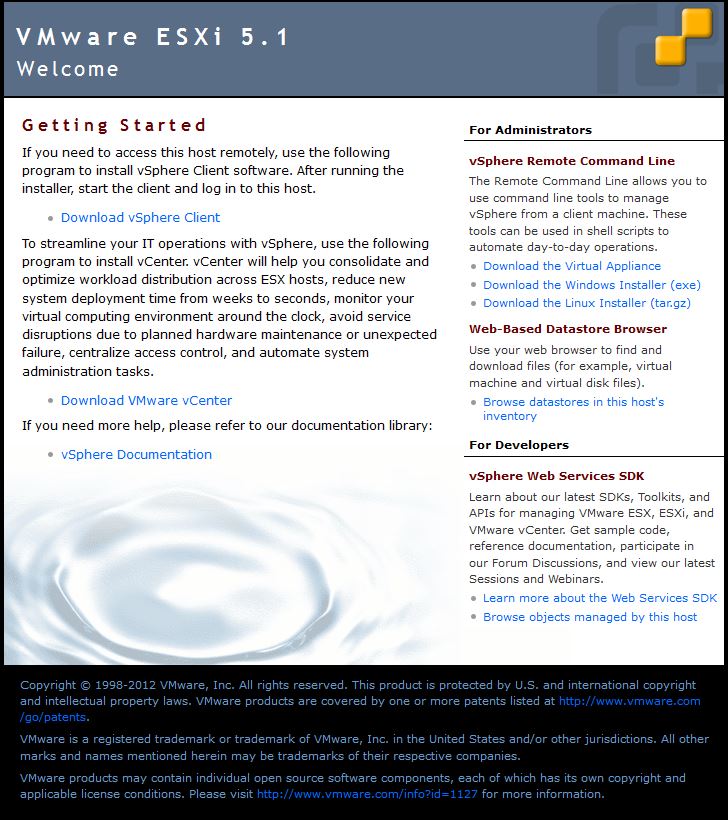
    This is one that a lot of people don’t seem to be aware of – did you know you could access your ESXi server’s datastores via a browser? It’s a convenient way of grabbing copies of ISOs or patches stored on your server for burning or use elsewhere. It’s set up automatically with ESXi – simply enter in the IP address of your local ESXi server and you should see a page akin to the following:


    Click on the link on the right-hand side to view the datastores and you will be prompted for a login:


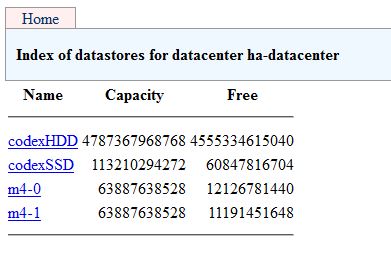
    Enter your login – usually the root login you created when you installed ESXi. From there you should be taken to a page where you can see a listing of all of your available datastores:


    From there you can browse the contents of the datastores and download files as you please! It can also be handy as a quick way of viewing log files.

  • esxcli: Update/patch produces “Could not download from depot” error

    In ESXi 5.1 you can patch using the following command:


    esxcli software vib install -d /path/to/patch.zip


    If you’re getting the following result (using ESXi510-20121001.zip as an example):


     [MetadataDownloadError]
    Could not download from depot at zip:/var/log/vmware/ESXi510-201210001.zip?index.xml, skipping ((‘zip:/var/log/vmware/ESXi510-201210001.zip?index.xml’, ”, “Error extracting index.xml from /var/log/vmware/ESXi510-201210001.zip: [Errno 2] No such file or directory: ‘/var/log/vmware/ESXi510-201210001.zip’”))
    url = zip:/var/log/vmware/ESXi510-201210001.zip?index.xml
    Please refer to the log file for more details.


    This results from not putting in the absolute path to the .zip – e.g. using:


    esxcli software vib install -d ESXi510-20121001.zip


    rather than:


    esxcli software vib install -d /vmfs/volumes/datastore/ESXi510-20121001.zip


    Putting in the full path to the .zip file should resolve that error.

  • Checking SSD health with ESXi 5.1

    A new feature with ESXi 5.1 is the ability to check SSD health from the command line. Once you have SSH’d into the ESXi box, you can check the drive health with the following command:


    esxcli storage core device smart get -d [drive]


    …where [drive] takes the format of: t10.ATA?????????. You can find out the right drive name by the following:


    ls -l /dev/disks/


    This will return output something like the following:


    mpx.vmhba32:C0:T0:L0
    mpx.vmhba32:C0:T0:L0:1
    mpx.vmhba32:C0:T0:L0:5
    mpx.vmhba32:C0:T0:L0:6
    mpx.vmhba32:C0:T0:L0:7
    mpx.vmhba32:C0:T0:L0:8
    t10.ATA_____M42DCT064M4SSD2__________________________000000001147032121AB
    t10.ATA_____M42DCT064M4SSD2__________________________000000001147032121AB:1
    t10.ATA_____M42DCT064M4SSD2__________________________0000000011470321ADA4
    t10.ATA_____M42DCT064M4SSD2__________________________0000000011470321ADA4:1


    Here I can use the t10.xxx names without the :1 at the end to see the two SSDs available, copying and pasting the entire line as the [drive]. The command output should look like:


    ~ # esxcli storage core device smart get -d t10.ATA_____M42DCT064M4SSD2__________________________000000001147032121AB
    Parameter                     Value  Threshold  Worst
    —————————-  —–  ———  —–
    Health Status                 OK     N/A        N/A
    Media Wearout Indicator       N/A    N/A        N/A
    Write Error Count             N/A    N/A        N/A
    Read Error Count              100    50         100
    Power-on Hours                100    1          100
    Power Cycle Count             100    1          100
    Reallocated Sector Count      100    10         100
    Raw Read Error Rate           100    50         100
    Drive Temperature             100    0          100
    Driver Rated Max Temperature  N/A    N/A        N/A
    Write Sectors TOT Count       100    1          100
    Read Sectors TOT Count        N/A    N/A        N/A
    Initial Bad Block Count       100    50         100

    One figure to keep an eye on is the reserved sector count – this should be around 100, and diminishes as the SSD replaces bad sectors with ones from this reservoir. The above statistics are updated every 30 minutes. As a point of interest, in this case ESXi isn’t picking up on the data correctly – the SSD doesn’t actually have exactly 100 power-on hours and 100 power cycle count.

    Assuming it works for your SSDs, this is quite a useful tool – knowing when a drive is likely to fail can give you the opportunity for early replacement and less downtime due to unexpected failures.