Author: sotech

  • Ubuntu Server Benchmarks: Phoronix Test Suite


    The Phoronix Test Suite is another option when it comes to benchmarking your Ubuntu Server – this one doesn’t work out-of-the-box and requires you to choose the types of benchmarks you wish to run and install them either individually or as suites of benchmarks. You can download it at the following link currently:


    wget http://phoronix-test-suite.com/releases/repo/pts.debian/files/phoronix-test-suite_4.4.1_all.deb


    Then:


    chmod +x phoronix-test-suite_4.4.1_all.deb


    Install like so:


    dpkg -i phoronix-test-suite_4.4.1_all.deb


    You can run it for the first time with the following:


    phoronix-test-suite


    You will be shown a page of the package’s terms and conditions and prompted to accept them. To see a list of available benchmarks, run:


    phoronix-test-suite list-tests


    If you wanted to install the blake2 benchmark as an example, you would run:


    phoronix-test-suite install blake2


    This will install the blake2 test and try to address any unmet dependencies (e.g. install packages which that benchmark requires to run that aren’t already installed). To run an installed test, issue the following command (using blake2 as an example again):


    phoronix-test-suite benchmark blake2


    If you are interested in running a suite of tests (or just want to run a few tests without having to individually install the lot of them) you can list whole suites of tests at once with:


    phoronix-test-suite list-available-suites


    The install process is the same as for an individual test:


    phoronix-test-suite install [suitename]


    If you’re looking to measure a specific metric there’s plenty to choose from here – there’s a lengthy list of available tests and suites. As an example of results, here’s the chess benchmark:
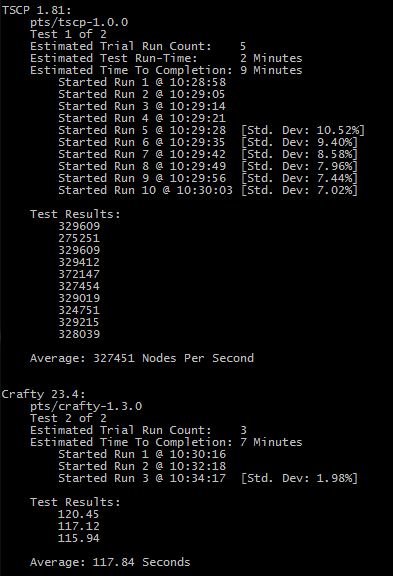
     

    ubuntuBenchmark-phoronix-chess

  • Ubuntu Server Benchmarks: Hardinfo


    Hardinfo is one of the command-line benchmarks available for Ubuntu Server – it does have graphical features so it will also be useful for Ubuntu Desktop users, but for the purpose of this piece we will assume you’re at a terminal. It not only runs benchmarks like Blowfish but also shows you a great deal of information about the system itself, like ARP tables, sensors, CPU/RAM details and more.


    To install, run the following:


    sudo apt-get install hardinfo


    You can run it without using less to view the results, but you’ll probably want to pipe the results to less to make it a bit easier to navigate the pages of text. Run it with the following:


    hardinfo | less


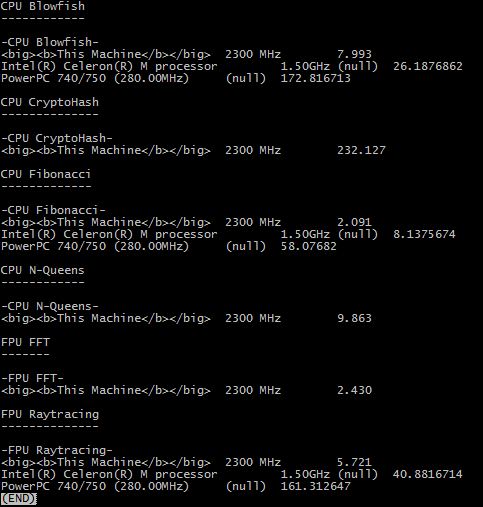
    This pipes the output to the “less” command – once the command completes you will be able to navigate the results with the up/down and pageup/pagedown keys. To quit less press “q”. At the bottom of the results are the benchmarks; they will look something akin to this:


    ubuntuBenchmark-hardinfo


    The benchmark in this case was run on an ESXi VM with two 2.3GHz CPUs. It’s not the prettiest output but it provides quite a bit of potentially useful information. The output from hardinfo is a whole lot prettier when you have a GUI!

  • Intel Gigabit CT Desktop Network Adapter Review


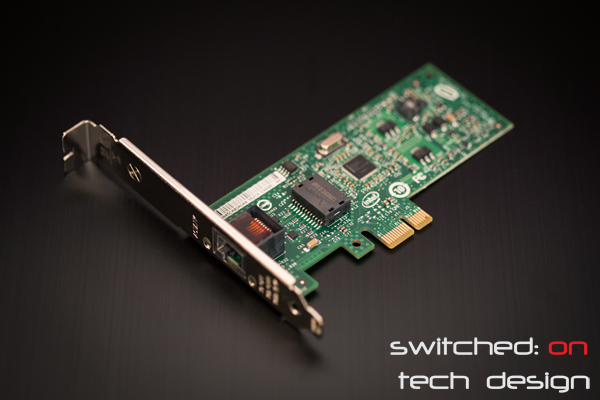
    intel-pro-1000-ct-gigabit-nic-01


    Intel’s network cards are popular due to their speed and reliability, which is often greater than the onboard chips in devices/motherboards. The Intel Gigabit CT Desktop Network Adapter is a PCI-E x1 add-in card with a single gigabit port, usually selling for around $30AU. It is low-profile and should come with a low-profile bracket – handy for thin HTPCs or servers – and is passively cooled as you would expect. It auto-negotiates – so you don’t need to worry about crossover cables – and is PCI-E v.1.1, which supplies more than enough bandwidth for a single gigabit port and should work fine in V2 and V3 slots. It is also supposed to be compatible with x1, x4, x8 and x16 slots. The network controller is Intel’s 82574L – a design released in 2008, with an expected discontinuance of 2018 – Intel certainly expect to get a lot of mileage out of that chip!


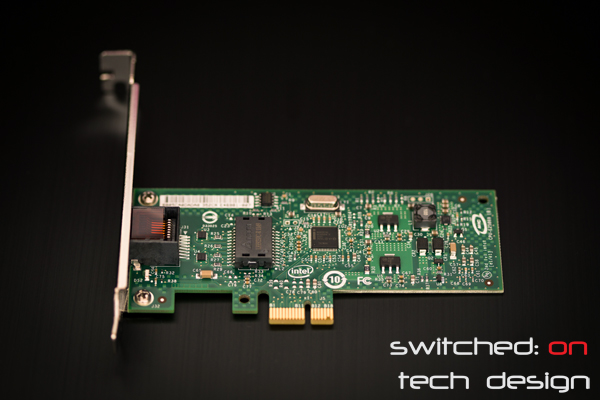
    intel-pro-1000-ct-gigabit-nic-02


    The 82574L has a TDP of below a single watt, so this is going to be quite a power-efficient add-in card. Intel state that the typical power consumption is in the range of 1.9W for the entire card. Driver support is excellent across virtually all operating systems – it’s plug and play with many Linux distros and works perfectly well with the provided drivers in Windows machines. It also has support for teaming/bonding/link aggregation and 9K jumbo frames. Physically the card is 11.92cm long and 5.53cm wide.


    In our tests the card managed an impressive average of approx. 950Mbit/s – very close to the theoretical maximum throughput of a gigabit line.


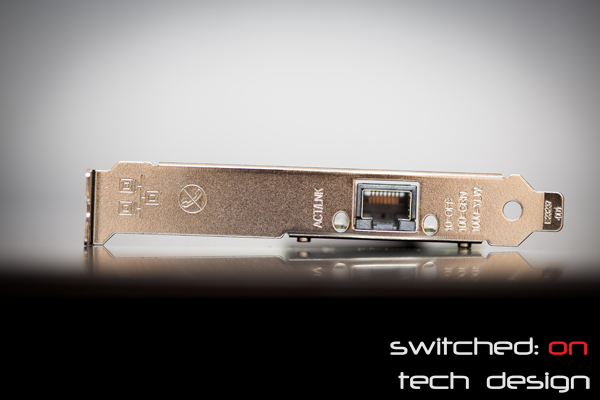
    intel-pro-1000-ct-gigabit-nic-03


    If you are in the market for a reliable, fast PCI-Express network card and only need a single port this card is well worth a look – between the features, low power usage, low profile option and driver support it’s an excellent buy for the price.

  • Telnet easter egg


    For those that haven’t seen this before, someone reminded me of this the other day:


    telnet towel.blinkenlights.nl


    Enjoy 😉

  • How to set up SNMP monitoring (snmpd) on Ubuntu 12.04


    This one caused a bit of hassle recently – a few online guides don’t seem to work with the current version of Ubuntu. We found that this works, at least in the ~10 or so servers we have tried so far:


    sudo apt-get install snmpd


    Back up your snmpd.conf file:


    sudo mv /etc/snmp/snmpd.conf /etc/snmp/snmpd.conf.old


    Create a new file:


    sudo touch /etc/snmp/snmpd.conf


    Edit with your chosen editor and put in the following:


    rocommunity public

    syslocation “Describe the server’s location”

    syscontact [email protected]


    Save and exit. Now edit the following file:


    /etc/default/snmpd


    Comment out the following line by putting a # before it:


    SNMPDOPTS=’-Lsd -Lf /dev/null -u snmp -g snmp -I -smux -p /var/run/snmpd.pid’


    On the next blank line add the following:


    SNMPDOPTS=’-Lsd -Lf /dev/null -u snmp -I -smux -p /var/run/snmpd.pid -c /etc/snmp/snmpd.conf’


    Save the file and restart the SNMP daemon:


    sudo /etc/init.d/snmpd restart


    Now you should be able to successfully snmpwalk locally and from machines on the local network.

  • MySQL: How to create a database


    To create a simple database (e.g. if you need to create one for a WordPress or Wiki install) use the following after logging in to MySQL as the root user:


    create database [nameOfDatabase];


    Don’t forget the ; at the end, or you’ll end up on a new line consisting of a > prompt waiting for more input. You can put the ; in then if you forgot to complete the command. An example of the above would be:


    create database wikiDB;


    …which would create the database named wikiDB. You should see the following on a successful command:


    Query OK, 1 row affected (0.04 sec)


    If that is all you had to do you can now exit MySQL by typing:


    exit


    …and you’re done!

  • Ubuntu: How to update PHP’s timezone


    We came across this one recently when setting up a Zabbix server, where the installation would not proceed until the PHP timezone was set. This is quite straightforward – using your favourite editor edit:


    /etc/php5/apache2/php.ini


    Look for the Module Settings section or search for:


     date.timezone


    (in vi /date.timezone should get you there). Uncomment the line by removing the leading ; and then add in your desired timezone. For Sydney it would look like:


    [Date]

    ; Defines the default timezone used by the date functions

    ; http://php.net/date.timezone

    date.timezone = UTC+10


    Change UTC+10 to your desired timezone, save the file and restart Apache:


    sudo service apache2 restart


    Voila!

  • How to remove/delete old or unused kernels in Ubuntu


    If you have upgraded your kernel you will have found that Ubuntu keeps the older ones around, which can be handy if something breaks in the newer kernel and you have to boot from your old system. Over time, however, these can add up in terms of the amount of space consumed – at around 150MB per kernel you could easily find yourself with over a GB of old kernels if you’ve upgraded enough times. In this example the system we are using is Ubuntu 12.0.4.2. If you’re using Ubuntu Desktop, open up a terminal window – if you’re using Ubuntu Server, log in as usual and run:


    uname -r

    to see which kernel you are currently running. Make sure not to delete this one. Now, to see a list of the installed kernels, we run:


    dpkg –list | grep linux-image

    This command lists the installed packages and filters the list to include only those which have “linux-image” in them, which should only be your kernels. Your list should look something along the lines of:


    ii  linux-image-2.6.32-33-server 2.6.32-33.72     Linux kernel image for version 2.6.32 on x86_64
    ii  linux-image-3.2.0-35-generic 3.2.0-35.55      Linux kernel image for version 3.2.0 on 64 bit x86 SMP
    ii  linux-image-3.2.0-38-generic 3.2.0-38.61      Linux kernel image for version 3.2.0 on 64 bit x86 SMP
    ii  linux-image-server           3.2.0.38.46      Linux kernel image on Server Equipment.


    To remove a kernel, run the following:


    sudo apt-get purge [kernel]


    Using the above list, say we want to get rid of 3.2.0-35. In that case the command would be:


    sudo apt-get purge linux-image-3.2.0-35-generic


    Once you have removed your unwanted kernels run:


    sudo update-grub2


    This will update the boot menu accordingly.