Category: Server

  • How to find number of cores in Ubuntu (or other versions of Linux)?


    If you’re using a virtual server (whether online or your own physical machine) it can be handy sometimes to check how many CPU cores are available; here are two easy methods of doing this. The first:


    nproc


    This will return a single number, whether it be 1, 2, 4 or otherwise. For a more detailed look, try:


    lscpu


    This will usually give a more complex readout, e.g.:


    root@server [/]# lscpu
    Architecture:          x86_64
    CPU op-mode(s):        32-bit, 64-bit
    Byte Order:            Little Endian
    CPU(s):                1
    On-line CPU(s) list:   0
    Thread(s) per core:    1
    Core(s) per socket:    1
    CPU socket(s):         1
    NUMA node(s):          1
    Vendor ID:             GenuineIntel
    CPU family:            6
    Model:                 45
    Stepping:              7
    CPU MHz:               2000.024
    BogoMIPS:              4000.04
    Hypervisor vendor:     Xen
    Virtualization type:   para
    L1d cache:             32K
    L1i cache:             32K
    L2 cache:              256K
    L3 cache:              15360K
    NUMA node0 CPU(s):     0


  • Finding /var/log/auth.log in CentOS 6


    This one is straight-forward – if you’re used to Debian and are in a CentOS system looking for /var/log/auth.log you’ll find it in:


    /var/log/secure


    Short and sweet!

  • Samba log showing error: failed to retrieve printer list


    If you’re using Ubuntu and seeing the following error in your Samba log:


    Failed to retrieve printer list: NT_STATUS_UNSUCCESSFUL


    If you are a home user and using samba purely for file sharing from a server or NAS you’re probably not interested in sharing printers through it. If so, you can prevent this error from occurring by adding the following lines to your /etc/samba/smb.conf:


    printing = bsd

    printcap name = /dev/null


    Restart samba:


    /etc/init.d/smbd restart


    …check your logs:


    less /var/log/samba/log.smbd


    and the error should now no longer be appearing.

  • How to see individual CPU core loads in Ubuntu


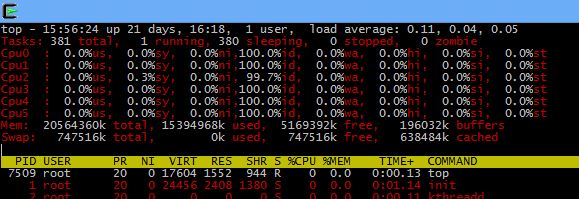
    This is an interesting one – if you have the need to monitor your CPU usage individually across cores it’s actually quite easy with the top command. Simply run top and hit “1” – your output will go from:


    topSingleView

    to:


    topMultiCore

    In this case the server is a hexcore (0-5 cores shown, 6 in total) and we can clearly see the loads across each of them. To get colours – it can make top easier to read – hit Z.


    This can be quite handy for monitoring your CPU usage in more detail than basic load averages.

  • Using rsync with a non-standard SSH port


    There are many reasons you may be using an SSH port other than 22; perhaps you changed it as a security measure, or perhaps you have multiple machines behind your firewall which you are port forwarding to and thus have to use other ports in addition to 22. Rsync is an extremely powerful file synchronization tool which by default uses SSH to connect your source and destination, thus if you have changed your SSH port you will need to tell rsync. This can be easily done with the e switch like so (using 2222 as the new SSH port as an example):


    rsync -e “ssh -p 2222” /path/to/source [email protected]:/path/to/destination


    As a practical example using the other options -avzP (our typical selection) your command might look like:


    rsync -avzP -e “ssh -p 2222” /home/user/myfile [email protected]:/home/user/


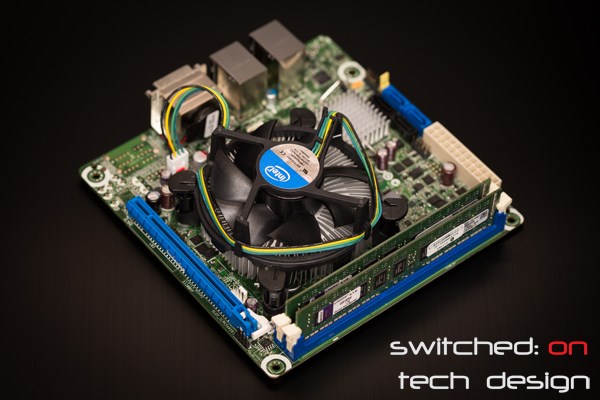
  • New Intel Motherboard in-house: S1200KPR Mini-ITX Server board


    We’ve been building a few mini servers with these lately and finally found the time for a bit of a write-up – we’re almost finished, so keep your eyes peeled for a review shortly!

  • How to restart NFS server on Ubuntu


    Once you set up your NFS exports by adding lines to /etc/exports you need to restart your NFS server; do this with the following:


    sudo /etc/init.d/nfs-kernel-server restart


    You should see output along the lines of:

     * Stopping NFS kernel daemon                 [ OK ]
    * Unexporting directories for NFS kernel daemon…           [ OK ]
    * Exporting directories for NFS kernel daemon…
    exportfs: /etc/exports [1]: Neither ‘subtree_check’ or ‘no_subtree_check’ specified for export “10.1.1.87/24:/nfs/sharedDir”.
    Assuming default behaviour (‘no_subtree_check’).
    NOTE: this default has changed since nfs-utils version 1.0.x


    Assuming no error messages pop up here you should now try to connect to your NFS share.

  • ESXi: Accessing datastores via web browser


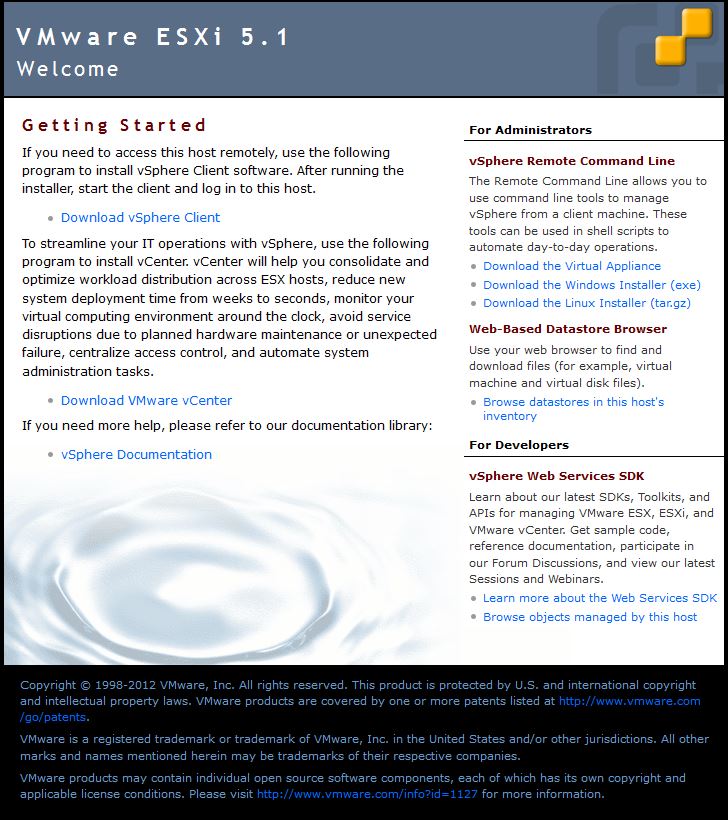
    This is one that a lot of people don’t seem to be aware of – did you know you could access your ESXi server’s datastores via a browser? It’s a convenient way of grabbing copies of ISOs or patches stored on your server for burning or use elsewhere. It’s set up automatically with ESXi – simply enter in the IP address of your local ESXi server and you should see a page akin to the following:


    Click on the link on the right-hand side to view the datastores and you will be prompted for a login:


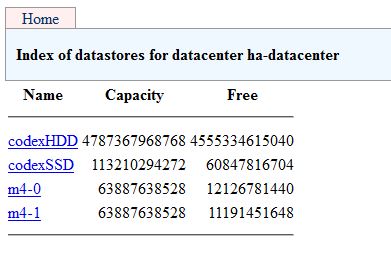
    Enter your login – usually the root login you created when you installed ESXi. From there you should be taken to a page where you can see a listing of all of your available datastores:


    From there you can browse the contents of the datastores and download files as you please! It can also be handy as a quick way of viewing log files.

  • Ubuntu: Clear terminal screen


    Sometimes you may wish to clear the terminal window, whether it be to hide what you’ve just done, clear some irrelevant/distracting output or any other reason. The best command to do this is simple:


    reset


    This completely clears the output shown in your terminal window but doesn’t log you out. If you want to keep your output in the buffer (i.e. so you can scroll back up to it) but still clear the terminal you can see you can use the following key combination:


    ctrl+L


    This pushes the output up above your prompt and puts the prompt at the top of your window.


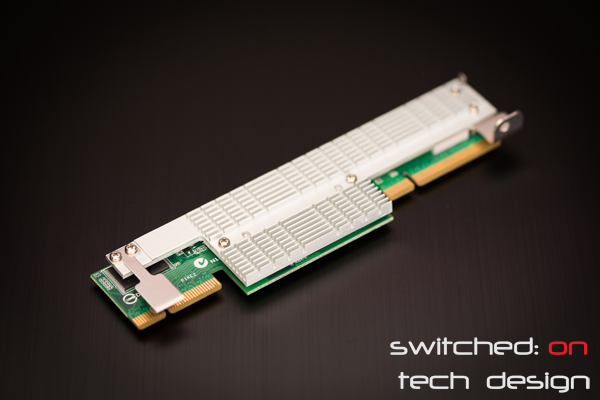
  • Asus Pike 2008 SAS card


    We have finally got one of these cards in-house for testing;


    We’re particularly interested in how it compares to cards like the M1015 in IT mode as an inexpensive way of adding 8 SAS/SATA ports to a storage server. Expect a post soon reporting on what we find!

    You can buy the Asus PIKE 2008 card from Amazon.com: