Tag: How To

  • XenServer 6.2: How to boot a VM to CD/DVD rather than disk


    We had a situation recently where a customer was experimenting with XenServer 6.2 and Ubuntu VMs; he accidentally powered off the VM during a distribution upgrade and the VM would only boot with a read-only filesystem. Loading an ISO into the virtual CD drive didn’t do the trick; there’s no obvious way of booting to another medium during the boot process.


    The trick is to boot into recovery mode; when the VM is powered off, select it and follow the menus like so:


    VM -> Start/Shutdown -> Start in Recovery Mode


    The VM should now boot to your Live CD/Rescue CD/etc.

  • How to install XenServer 6.2 – Step By Step


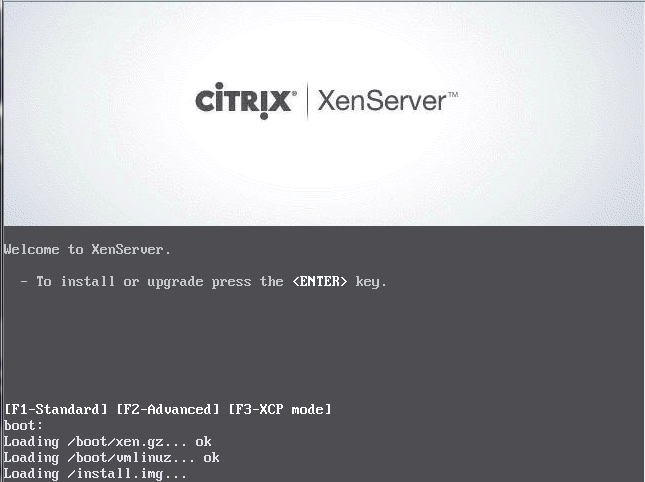
    With the recent public availability of XenServer 6.2 there are an increasing number of people wanting to try it; here is a walk-through of an install so that you know what to expect if you want to try it yourself. In this example we are using a NFS datastore on the network to store VM files. First, burn the ISO installer to a CD and boot to it:


    xen-000


    (more…)

  • Ubuntu: Bringing a detached tmux session back


    If you’re just starting out with tmux you may have installed it, set up a session, detached and then… what?


    To re-join your detached session, simply run:


    tmux attach


    and you’re back in business.


  • Ubuntu: How to change tmux’s ctrl+b binding to ctrl+a


    If you’re used to screen you’ll be in the habit of using ctrl+a, for example detaching a session with ctrl+a then d – if you make the move to tmux it’s ctrl+b then d, which can take some getting used to. Often it’s easier to make tmux get used to you! To change tmux from ctrl+b to ctrl+a, make sure tmux isn’t running and create the following file:


    vi ~/.tmux.conf


    Here we have used the text editor vi to create the file. Now add the following:


    unbind C-b

    set -g prefix C-a


    Save the file. Now the next time you start tmux it should have changed to what you’re used to!

  • Ubuntu: How to create a file or folder using today’s date

    This is a useful little trick to use in your scripts – particularly for things like periodic backups.


    For a file:


    touch $(date +%F)


    creates the file 2012-11-18


    For a folder, let’s add the time after the date:


    mkdir $(date +%F-%H:%M)


    creates the folder 2012-11-18-09:00


    We can use this in a command, like so:


    tar -cf $(date +%F).tar /path/to/files/


    This creates the tarball (archive) file 2012-11-18.tar from the files in the /path/to/files/.


    To see the other options, type man date or visit the Ubuntu webpage on date here.

  • How to exclude results from grep


    Sometimes you may wish to further filter grep output, such as in the following situation:


    # zfs get all | grep compressratio

    backup01         compressratio         1.23x                  –
    backup01         refcompressratio      1.00x                  –
    backup01/data    compressratio         1.50x                  –
    backup01/data    refcompressratio      1.50x                  –
    backup01/photos  compressratio         1.05x                  –
    backup01/photos  refcompressratio      1.05x                  –

    Here we only really want to see the compressratio results, not the refcompressratio. We can pipe the grep output to another grep command, this time inverting the results with the -v switch.


    # zfs get all | grep compressratio | grep -v refcompressratio

    backup01         compressratio         1.21x                  –
    backup01/data    compressratio         1.50x                  –
    backup01/photos  compressratio         1.05x                  –

    This excludes any line containing refcompressratio, making the results easier to read. This is particularly helpful when you have a large number of results from grep.

  • ZFS: How to check compression efficiency


    If you have enabled compression on a ZFS folder you can check to see just how much disk space you’re saving. Use the following command:


    sudo zfs get all [poolname]/[folder] | grep compressratio


    An example:


    sudo zfs get all backup01/data | grep compressratio


    returns the following:


    backup01/data compressratio  1.50x  –


    Here we can see we have a compression ratio of 1.5x. Compression is an excellent way of reducing disk space used and improving performance, so long as you have a modern CPU with enough spare power to handle it. Some data will not be easily compressible and you may see less benefit – other data will be much more compressible and you may reach quite high compression ratios.


    If we run the same command on a folder full of already-compressed RAW image files:


    sudo zfs get all backup01/photos | grep compressratio

    backup01/photos compressratio 1.05x


    …we can see that they do not compress as easily as the documents in the data folder, giving us only a 1.05x compression ratio. You can see the compression ratio of all of your ZFS pools and folders with the following:


    sudo zfs get all | grep compressratio


    Check your own datasets and see how much you are saving!
  • Ubuntu: How to list drives by ID

    If you’re creating a  zpool on Ubuntu you have several options when it comes to referring to the drives; the most common is /dev/sda, /dev/sdb and so on. This can cause problems with zpools as the letter designated to a drive can change if you move the drives around, add or remove a drive – causing your zpool to come up as faulty. One way to avoid this is to use a more specific name for the disk, one of which is the ID. You can find this on Ubuntu through the following command:


    sudo ls -l /dev/disk/by-id/


    This gives an output similar to the following:


    lrwxrwxrwx 1 root root  9 Oct 19 08:48 ata-ST2000DM001-9YN164_W1F01W57 -> ../../sdd

    lrwxrwxrwx 1 root root  9 Oct 19 08:48 ata-ST2000DM001-9YN164_W2400946 -> ../../sdc

    lrwxrwxrwx 1 root root  9 Oct 19 08:48 ata-ST2000DM001-9YN164_W24009TB -> ../../sde

    lrwxrwxrwx 1 root root  9 Oct 19 08:48 ata-ST2000DM001-9YN164_W2402PBQ -> ../../sdb

    lrwxrwxrwx 1 root root  9 Oct 19 08:48 ata-ST2000DM001-9YN164_Z24064V7 -> ../../sda


    You can see that the command helpfully points which ID is associated with which /dev/sd?.

  • How to find kernel version in Ubuntu 12.04 Precise Pangolin

    Note: This also works in other versions of Ubuntu, such as 11.10, 11.04, 10.10, 10.04 and earlier.


    Sometimes you may wish to find out which kernel you’re  currently running; fortunately, this is quite easy to do with the uname command. If you’re running Ubuntu Desktop, open up a Terminal; if you’re using Ubuntu Server log in as per usual and then run:


    uname -v

    …for the kernel version, or:


    uname -r

    for the kernel release. You can combine the two and use:


    uname -rv

    to see both of those with the one command.

  • How to reset a ProCurve 2510-24g to default settings

    Here’s one someone asked me today – it’s reasonably straight-forward, though not necessarily obvious:


    • Press in both the Clear and Reset buttons (tiny buttons on the left edge)
    • Release the Reset button after the port lights come on (~2 seconds)
    • When the Self-Test LED starts flashing (to the left of the Clear and Reset buttons), release the Clear button.


    This resets the switch to the factory default settings, including the IP address. By default this switch uses DHCP for its IP if available; try checking your router’s DHCP client list after the switch boots if you’re having trouble finding it.


    These switches are popping up in the hands of enthusiasts more regularly now that they’re quite cheap to come by; they can be quite handy for hooking up a large number of devices which don’t require a gigabit connection (printers, UPS’, modems, IP cameras etc.) – 24 100Mb ports and two gigabit ports in a fanless, rack-mountable chassis can be quite handy.